- English
- French
- German
- Portuguese
- Spanish
- Russian
- Japanese
- Korean
- Arabic
- Greek
- German
- Turkish
- Italian
- Danish
- Romanian
- Indonesian
- Czech
- Afrikaans
- Swedish
- Polish
- Basque
- Catalan
- Esperanto
- Hindi
- Lao
- Albanian
- Amharic
- Armenian
- Azerbaijani
- Belarusian
- Bengali
- Bosnian
- Bulgarian
- Cebuano
- Chichewa
- Corsican
- Croatian
- Dutch
- Estonian
- Filipino
- Finnish
- Frisian
- Galician
- Georgian
- Gujarati
- Haitian
- Hausa
- Hawaiian
- Hebrew
- Hmong
- Hungarian
- Icelandic
- Igbo
- Javanese
- Kannada
- Kazakh
- Khmer
- Kurdish
- Kyrgyz
- Latin
- Latvian
- Lithuanian
- Luxembou..
- Macedonian
- Malagasy
- Malay
- Malayalam
- Maltese
- Maori
- Marathi
- Mongolian
- Burmese
- Nepali
- Norwegian
- Pashto
- Persian
- Punjabi
- Serbian
- Sesotho
- Sinhala
- Slovak
- Slovenian
- Somali
- Samoan
- Scots Gaelic
- Shona
- Sindhi
- Sundanese
- Swahili
- Tajik
- Tamil
- Telugu
- Thai
- Ukrainian
- Urdu
- Uzbek
- Vietnamese
- Welsh
- Xhosa
- Yiddish
- Yoruba
- Zulu
Is a 4.3-inch serial port screen Ideal for 3D Printers?
A 4.3-inch serial port screen is excellent for most FDM 3D printers – and typically the wisest single addition you can make. This size strikes a practical sweet spot. It's large enough to show real temps, progress bars, and touch buttons. So small that it can be fitted to a printer frame with little alteration. Your mainboard speaks to a serial port screen using UART. So the wiring is straightforward: power, ground, and two data lines. In this article, I describe what to look for, how to match a screen to your board, and where this display class excels. The advice is based on genuine client projects at Guition.

But “ideal” depends on your printer, your firmware, and your tolerance for wiring. Replacing a decrepit 12864 LCD on a five-year-old system with a 4.3-inch serial port screen. It may also be the primary panel on a brand-new DIY construction. It may disappoint you as well.
Before we go deeper, here is the practical part. If your project needs a dependable 4.3-inch serial port screen, Guition gives you free UI development software. You build the interface by dragging and dropping widgets — no C code required. Email david@guition.com with your mainboard model, and our engineers will confirm wiring, firmware, and baud-rate settings within one business day. As a 4.3-inch serial port screen manufacturer, we ship samples worldwide with full documentation.
What Features Should a 4.3-inch serial port screen have?
A serial port screen is a small computer with a display attached. The panel runs its own firmware, and your printer's mainboard sends commands over a serial link. That split matters: the board keeps its processing power for motion control, while the screen handles menus, graphics, and touch. For 3D printers, four features separate a great 4.3-inch serial port screen from a frustrating one.
Resolution and panel quality set the floor
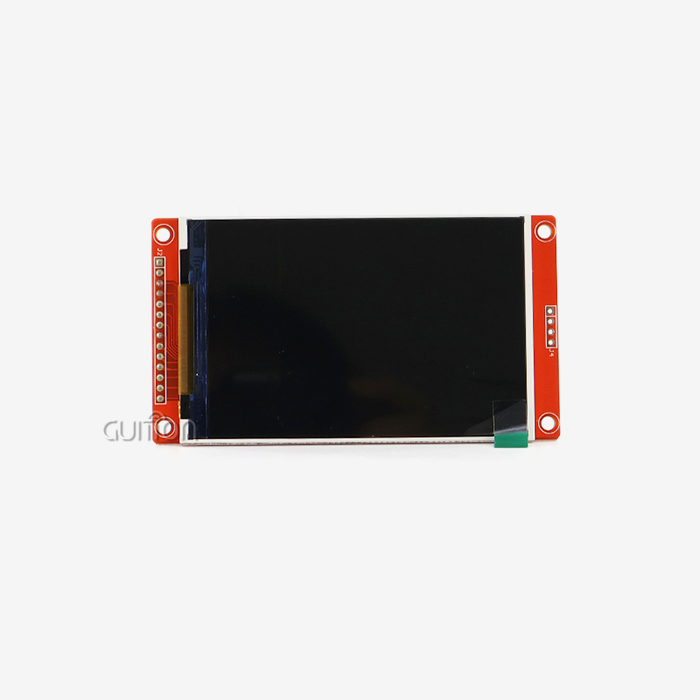
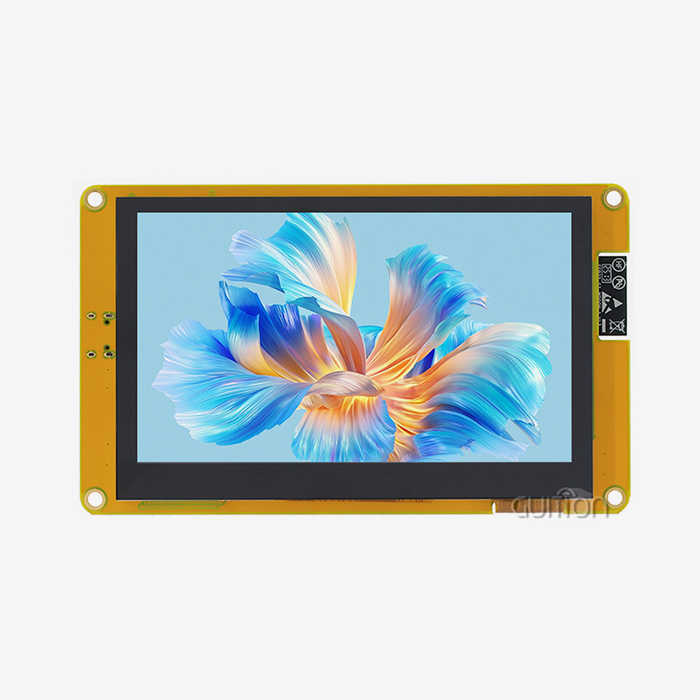
The cheapest 4.3-inch screens employ TFT displays with 480x272. They function, but the lettering seems soft, and the little icons blur. Better models operate at 800x480, almost twice the pixels. MKS H43 is a popular serial screen for Marlin boards that is made according to this formula. 800x480, IPS LCD, capacitive touch. IPS helps maintain the colors looking good when you view the screen from an angle – handy when a printer is sitting on a shelf above eye level. Check the 2 numbers before you purchase. They determine how comfortable the interface is on every print day.”
Touch type changes the daily feel
Most serial screens offer one of two touch layers. Resistive screens register pressure, so they work with gloves, styluses, or any object. Capacitive screens respond to light finger taps, like a phone, and feel far more modern. For a printer used in a workshop, I lean toward capacitive — the response is snappier, and mistaps drop. If operators wear thick gloves, resistance earns another look.
The software toolchain decides your time budget
This is the point when a serial screen wins or loses vs a conventional LCD. We have free host computer software called Guition, where you drag widgets to a canvas to design pages. You get rich built-in controls — gauges, sliders, buttons, graphs — and you adjust properties in a side panel. You see the effect immediately in a simulator, long before you touch hardware. The editor is launched in a browser; thus, it works on Windows, macOS, and Linux with no installation. WYSIWYG, or what you see is what you get, means the screen you design is the screen you send. A firmware engineer who creates HMI firmware for printer OEMs said it frankly. He informed me that once a customer sees the drag-and-drop editor, a three-month GUI job becomes a week-long project.
Here are the core features I check on every serial screen we send to printer builders:
- Panel and resolution. My minimum requirements would be 800×480 resolution with an IPS panel for 3D printer usage. Lower-end 480×272 TFT screens are OK for basic status displays, but they blur tiny text and make thick menus difficult to see, which slows down operation and causes more errors during lengthy printouts.
- Touch layer: The majority of printer users choose capacitive touch since it reacts to light touches and seems natural to any phone user. Gloves and dirty settings still make sense for resistive touch. Some listings conceal the touch type. Ask for it in the datasheet. That absence masks a substantial usability difference.
- Serial port. -The screen should offer a TTL UART port with a defined pinout and a clear voltage tolerance (3.3V or 5V). -- A clean four-pin connector -- power, ground, TX, RX -- makes the retrofit straightforward. Screens that need specialized ribbon adapters or proprietary connections increase expense and failure areas with little advantage.
- Development and support ecosystem. A screen is only as good as the toolchain that backs it up. Find free editing software, WYSIWYG simulation, example projects, and a knowledge base with wiring diagrams. That’s the goal behind Guition: the product library and knowledge base allow a new user to ship a functional dashboard in a day, not a month.
- More connections. The built-in Wi-Fi and Bluetooth are quite handy. You can make remote updates, integrate with smart home systems, and access your phone. You can examine a lengthy print from another room using a printer with WiFi, without installing a Raspberry Pi or camera setup. It also enables the vendor to deliver a fresh UI over the air after the machine ships.
These five features solve the pains we hear most: unreadable screens, sluggish touch, confusing wiring, and weeks of UI work. Nail them, and the screen becomes the easiest part of the printer to live with.
How does a 4.3-inch serial port screen improve 3D Printing?
A 4.3-inch serial port screen improves printing the same way a good dashboard improves driving. You spend less time hunting for controls and more time watching results. The improvement shows up in two measurable places: daily operation speed and failure rates.
Daily operations get faster
Consider a normal print start. A knob-controlled 12864 LCD – that’s a 128-by-64-pixel monochrome screen – lets you navigate through menu settings to adjust temperatures, reposition the nozzle, and start the work. There is a touch screen with preheat settings on one page, and a single press ignites them. In our support records, most customers report preheat reducing from about 90 seconds to under 10 seconds each print. Run 200 prints a month, and that’s around four and a half hours saved just on temperature setup.” Likewise for filament loading. A dedicated button beats five menu levels every time.
Fewer failed prints from interface mistakes
Interface failures do significant harm. An incorrect temperature input, an unintentional pause, a cancel touched at the wrong time. Big labeled buttons on touch displays reduce that danger. In the refit case study below, our customer’s print farm saw a 30% reduction in interface-related errors. That figure is for the quarter following the panel changeover. It’s easy to see the machine’s status at a glance, thanks to larger touch targets and color-coded states (red for heated, green for ready).
Can a 4.3-inch serial port screen Simplify Printer Control?
Yes — and this is the reason most buyers switch. A 4.3-inch serial port screen replaces deep menu trees with visual pages, which changes how much training a machine needs. That matters for owners and for shops that hire new operators.
Menus built for fingers, not knobs
A 12864 LCD can only display a few characters per line. That means firmware engineers have to conceal settings deep in nested menus, and users have to cycle through options using a rotary knob, one click at a time. A 4.3-inch touch panel provides a complete page of selections at a time. Z-offset adjustment, flow rate and speed override, and live temperatures may all be on the same screen. Feedback from customers suggests that new users become acquainted with a touch panel in about an hour, and a knob interface in several days.
Set up workflows that guide the operator
Modern panels also sequence workflows. A leveling wizard walks you through each corner with pictures and a big "done" button. A filament-change routine pauses the print, retracts, waits, and resumes — all from one flow. On a serial screen, this logic lives in the screen's firmware, so the mainboard keeps doing its job without modification. That separation is the quiet superpower of serial HMI (human-machine interface) design.
4.3-inch serial port screen for Real-Time Print Monitoring
A 4.3-inch serial port screen earns its place during long prints, when nobody wants to hover over the machine. Real-time monitoring turns a box that prints into a machine you can trust from across the room.
Live data at a glance
On one screen, a decent printer dashboard will indicate nozzle temperature, bed temperature, progress %, elapsed time, remaining time, Z height, and current speed. A 12864 LCD may display maybe two or three of these simultaneously, with menu cycling. The 800×480 screens we supply show seven or eight data fields cleanly, with alarms that flash when a number is out of its safe range. Thermal runaway alerts can not be missed, and Marlin firmware also takes active measures to prevent it (Marlin Firmware, 2025).
Pause, resume, and cancel with one tap
Mid-print problems need fast hands. A runout sensor pauses the job; the operator then swaps filament and resumes from the panel. The same touch screen cancels a failing print before it ruins a plate. On serial screens, these commands travel over UART as simple text commands, so the panel stays in sync with the board's state. That works without an OctoPrint host or a separate computer. Users tell us the pause-and-resume flow alone removes most of the stress of overnight printing.
Is UART Compatibility Important for a 4.3-inch serial port screen?
Compatibility is the whole game. A beautiful screen that cannot talk to your board is a paperweight, so UART behavior deserves attention before any other spec.
What does UART mean for your mainboard?
UART ( Universal Asynchronous Receiver-Transmitter) is a serial connection with two wires: one for transmit and one for receive, plus a common ground. Your printer mainboard already exposes UART ports — the same technology that feeds G-code, the standard command language printers obey. A serial screen uses the existing channel, thus no parallel data bus and no extra driver board. Most boards have a spare serial port, and Marlin reserves one for the LCD with a simple setup line (Marlin Firmware, 2025). Serial HMI panels proliferate across the ecosystem. They all speak the same plain-language serial communication protocol family (Nextion, 2025).
Baud rates, logic levels, and connectors
Three things will determine whether the connection works. Baud rate – the speed of the serial interface, typically 9600 or 115200 – must match between screen and firmware. Logic level: a 3.3V board either requires a screen that can accept 3.3V signals or a level shifter. Connector: certain boards expose the EXP1/EXP2 headers, the extension standard from the open-source RepRap movement (RepRap Wiki, 2025). Others have AUX or RJ11 headers. A few need a tiny adaptor. The MKS H43, for instance, arrives with adapters that allow the RJ11/AUX-1 to be converted to EXP1/EXP2 on boards such as the SKR series. Match these 3 things together, and integration takes minutes. Ignore them, and you get a blank panel and a big forum topic.
How to Match a 4.3-inch serial port screen with Your Mainboard?
Matching a 4.3-inch serial port screen to a mainboard takes ten minutes with a checklist. Without one, the job turns into a multi-day puzzle. Let me walk you through the process we use on our own bench.
Check firmware support before you order
Start with firmware, because that decides the protocol. On Marlin, you select the display in Configuration.h and set the serial port the panel uses. Many serial screens then speak Marlin's native graphical LCD protocol. Others use a vendor protocol like DWIN DGUS. On Klipper, the situation differs. Klipper's built-in display section handles character and graphic LCDs. Full touchscreen GUIs usually run through KlipperScreen on a Raspberry Pi or similar host (Klipper, 2025). So a serial screen fits Marlin machines most directly; Klipper users should confirm their host setup can drive the panel.
A ten-minute compatibility checklist
Here is the checklist we run before recommending any panel:
- Identification of board and firmware. Note the precise board type, the firmware version, and the firmware flavor — stock, Marlin, Klipper, or a vendor build. This is because serial-screen functionality was added later, and early Ender-3 boards with outdated stock firmware may not even disclose a viable serial LCD interface. This process takes two minutes and avoids most ordering errors.
- Connectors available. Check the board for free EXP1/EXP2, AUX, or UART headers and consult the board’s documentation for the pinout. Compare the outcome with the screen cable. If you require an adaptor, get it with the screen. You don’t want another shipping round. A brief snapshot of the header area allows the vendor to verify the match in advance.
- Baud rate and Voltage. Check the firmware to see what logic level (3.3V vs 5V) and baud rate it is using. Match the screen or choose a panel that auto-detects. The screens have established voltage tolerance; thus, your UART pins are protected from a costly failure. This is the step behind most blank displays, so double-verify this before you flash anything.
- Editor software and example projects. Make sure the provider offers free editing software, WYSIWYG simulation, and reference projects for your application. A vendor with a filled knowledge base will answer your queries before you ever contact them, saving you days of waiting. This check is the difference between a seamless week and a month of trial and error.
Walk through these four steps, and you remove nearly every integration surprise. The remaining questions — wiring order, protocol details, firmware settings — are what our engineers handle daily. We document each one in the Guition knowledge base.
4.3-inch serial port screen: Touch Control and Clear Displays
The touch layer and the display quality decide how the screen feels, and feeling drives adoption. Nobody keeps using a control panel that fights back.
Capacitive touch feels like a phone
Capacitive panels detect your finger's electrical charge, so a light tap registers instantly. That maps to muscle memory from smartphones, which means operators adapt without training. Resistive panels need deliberate pressure and sometimes a stylus. They still appear on budget screens, and they work with gloves. Their slower response, though, causes the occasional double-tap. On a machine where a wrong tap can pause a 12-hour print, response speed is a real safety feature. For 3D printers, I recommend capacitive unless gloves are mandatory.
Clear displays in bright rooms and at odd angles
Workshops are not dark rooms. Printers sit on shelves, near windows, or under bright LED strips. Panel brightness — measured in nits — makes the difference: a 250-nit panel looks washed out in sunlight, while 500-nit panels stay readable. IPS panels keep contrast when viewed from the side, which matters on a tall printer where you look up at the screen. Our 4.3-inch modules ship with 800×480 IPS panels and brightness tuned for shop lighting, and buyers regularly mention this in reviews. Check nits and panel type before you order; these specs rarely appear in flashy marketing copy, but they define daily usability.
Can a 4.3-inch serial port screen Upgrade Older 3D Printers?
Yes, and this is where the 4.3-inch class shines brightest. Older printers — the huge installed base of Ender-3-style machines — have capable motion systems and dated interfaces. A 4.3-inch serial port screen modernizes the machine for a fraction of the cost of a new one.
Case study: eight printers, one dashboard
I may provide a project from our client's record. An engineering firm in the Netherlands has an eight-printer farm of modified Ender-3 machines. They replaced each factory 12864 LCD with a 4.3-inch serial screen from our USART-HMI series and followed the results for a period of six months. Wiring time per printer fell from roughly six hours to less than one hour. A serial screen just requires four wires (5V, ground, TX, RX) rather than a complete LCD ribbon loom. They constructed a whole dashboard in Guition in 2 days using their tech. An equivalent UI in plain C code, by the shop’s last project, would have taken around three weeks. Filament changes decreased from roughly four minutes to less than two minutes. That was a specialized one-tap load and unload flow. The farm had 30% fewer interface-related mis-taps in the quarter following the change.
"We stopped fighting menus and started printing," as one of their techs put it. The farm has subsequently standardized on this identical panel for every new machine. Operators may switch between printers without retraining using the same interfaces. That consistency compounds: spare-parts bins diminish, onboarding speeds up, and print-quality data remains consistent across all eight machines.
Upgrade cost versus new printer
The economics are stark. A 4.3-inch serial screen module typically costs 25–45,whileanewentry−levelprinterstartsaround25–45,whileanewentry−levelprinterstartsaround250–300. Retrofitting an existing machine also keeps its calibrated motion system and proven heat bed. A few Chinese brands control roughly 90% of consumer desktop printer sales (HDIN Research, 2025). Most of those machines ship with basic screens. That leaves a huge retrofit market for better interfaces. If the printer prints well mechanically, the screen upgrade delivers the biggest perceived improvement per dollar spent.
4.3-inch serial port screen for Smarter Printer Interfaces
The best 4.3-inch panels do more than mirror the old menus; they open the printer to a wider smart ecosystem. This is the direction the market is moving, and it changes what "interface" means.
From printer panel to smart-home hub
Our screens carry built-in WiFi and Bluetooth, so the panel can join a smart home network. Customers run Home Assistant dashboards that show printer status, and several tell us the panel pairs with ESPHome-style setups without issues. The Guition host computer software also bundles speech recognition, so an operator can trigger presets by voice — useful when hands are covered in filament dust. These features sound like extras, but they change daily workflows. One customer checks all eight printers from a single tablet page. Another set up a voice command that preheats the machine before walking into the shop.
Print farms scale with identical panels
Multi-printer activities need consistency. Every machine has the identical 4.3-inch serial port screen. One UI. One training route. One spare-parts bin. Remote upgrade capability enables the farm to upgrade all the panel interfaces via WiFi without touching a single machine – an afternoon operation rather than a weekend. Operators trained on one unit can operate any unit. One of our agricultural customers attributes this to reducing new-hire onboarding from two days to two hours. And because the editor is web-accessible across platforms, that implies that the person who owns the UI may modify it from any laptop, anywhere.
Why Choose a 4.3-inch serial port screen for 3D Printers?
By now, the pattern is clear, but let me put it plainly. A 4.3-inch serial port screen offers the best balance of readability, touch quality, price, and simplicity for the majority of FDM printers. The table below compares it against the alternatives people ask us about most.
How it compares to other display options
| Option | Cost | Wiring | UI development | Best for |
|---|---|---|---|---|
| 12864 LCD with knob | $10–20 | Simple EXP ribbon | Firmware menus only | Budget builds, minimalists |
| 4.3-inch serial HMI | $25–45 | Four wires over UART | Drag-and-drop editor, WYSIWYG | Most hobby and prosumer FDM printers |
| 5–7-inch serial HMI | $45–90 | Four wires over UART | Same toolchain, more space | Complex menus, dual extruders, industrial panels |
| Tablet + Raspberry Pi (KlipperScreen) | $100–250+ | Network setup + host | Linux + Klipper config | Full remote control, multi-printer farms |
The 4.3-inch class wins on value: you get a modern touch interface without a host computer or network stack. It also follows the classic guidance on screen sizing. Simple text, small icons, and a few data points work great. Heavily crowded control pages belong on larger panels.
When a bigger screen makes more sense
Honesty keeps this advice useful. Choose a 5- or 7-inch panel if your printer runs multiple extruders, shows detailed graphs, or needs dense operator controls. Choose a Pi plus touchscreen setup if you want Klipper's full ecosystem, remote slicing, and camera feeds on the machine. And if your printer is a small, sealed industrial unit with fixed parameters, a simpler panel may be all you need. The 4.3-inch serial port screen sits in the middle by design: enough interface for real work, simple enough to own.
Conclusion
So — is a 4.3-inch serial port screen ideal for 3D printers? For most FDM machines, yes, with one honest condition: match it to your board and firmware. It upgrades readability, speeds up daily operation, simplifies control, and modernizes older printers at a fraction of the cost of new hardware. Our case study shows concrete gains. Wiring time fell from hours to under one. UI development dropped from weeks to days. Interface mistakes fell by 30%.
The market context supports the timing. The additive manufacturing market should grow from about 30.96billionin2025toroughly30.96billionin2025toroughly165 billion by 2033 (Pheonix Research, 2025). Most of those new machines — plus the millions already running — need good interfaces. A 4.3-inch serial port screen is the lowest-friction path to that upgrade. If you are weighing a screen swap, start with the checklist above. Confirm UART compatibility. Then pick a panel with a real software ecosystem behind it.
FAQ
1. Is a 4.3-inch screen big enough for a 3D printer?
Yes, for the vast majority of hobby and prosumer FDM printers. A 4.3-inch panel at 800×480 shows temperatures, progress, and touch buttons without clutter. It gets tight only for complex machines with many menus, detailed graphs, or crowded operator controls — those belong on 5- or 7-inch panels.
2. Will a 4.3-inch serial port screen work with my Ender-3 or SKR mainboard?
Usually yes, with one check: your control board must expose a usable UART port and run firmware that supports serial displays. Marlin machines are the easiest fit — boards like the SKR series and many Creality boards pair with serial screens, sometimes through a small adapter. Confirm the connector and baud rate before ordering.
3. Do I need to reflash my printer firmware to use one?
Often, yes, and that is a normal step. Most serial screens require a firmware change so the board knows the display exists and which serial port it uses. On Marlin, that means setting the display type and LCD serial port in Configuration.h. Vendors supply instructions; our knowledge base includes step-by-step guides for common boards.
4. Can I use a 4.3-inch serial port screen with Klipper?
With care. Klipper's built-in display support targets character and graphic LCDs, while full touchscreen GUIs usually run via KlipperScreen on a Raspberry Pi host (Klipper, 2025). Some serial screens work with Klipper through the host, but verify the exact model before buying. When in doubt, ask the vendor directly.
5. How hard is the wiring for a serial port screen?
Usually the easiest part. Most 4.3-inch serial screens need four wires: 5V, ground, TX, and RX. That is far simpler than the ribbon looms of older LCDs. The risky details are the logic level (3.3V vs 5V) and the connector pinout. Check the board manual and the screen datasheet side by side.
Get a Reliable 4.3-Inch Serial HMI for Your Printer Project
Choosing the right display does not end at the spec sheet. At Guition, every 4.3-inch serial port screen ships with free host computer software, WYSIWYG simulation, and remote upgrade support. Your printer interface keeps improving after it arrives. Send your board details to david@guition.com, and our engineers will confirm compatibility within one business day. We ship samples worldwide, and our product library covers sizes from 1.28 to 21.5 inches for whatever your next project needs.
References
1. Phoenix Research, "Global Additive Manufacturing (3D Printing) Market 2025–2033" (2025). https://www.pheonixresearch.com/press-release/global-additive-manufacturing-market-2025-2033
2. HDIN Research, "3D Printing Market Expected to Reach 8–12 Billion USD in 2025" (2025). https://www.hdinresearch.com/news/561
3. Marlin Firmware, official documentation (2025). https://marlinfw.org/
4. Klipper, "Configuration Reference" (2025). https://www.klipper3d.org/Config_Reference.html
5. Nextion, official product site — serial HMI displays (2025). https://nextion.tech/
6. RepRap Wiki, "RepRap — Welcome to RepRap.org" (2025). https://reprap.org/wiki/RepRap
About the Author
David is the CEO of Shenzhen Jingcai Intelligent Co., Ltd. The company focuses on human-machine interface displays and USART-HMI modules, from 1.28-inch to 21.5-inch sizes. He leads the team behind the Guition development platform. It brings drag-and-drop UI design, cross-platform debugging, speech recognition, and smart-home connectivity to display projects worldwide. David writes about HMI engineering, printer interfaces, and embedded display design from the perspective of a supplier who works with builders every day.
Learn about our latest products and discounts through SMS or email