- English
- French
- German
- Portuguese
- Spanish
- Russian
- Japanese
- Korean
- Arabic
- Greek
- German
- Turkish
- Italian
- Danish
- Romanian
- Indonesian
- Czech
- Afrikaans
- Swedish
- Polish
- Basque
- Catalan
- Esperanto
- Hindi
- Lao
- Albanian
- Amharic
- Armenian
- Azerbaijani
- Belarusian
- Bengali
- Bosnian
- Bulgarian
- Cebuano
- Chichewa
- Corsican
- Croatian
- Dutch
- Estonian
- Filipino
- Finnish
- Frisian
- Galician
- Georgian
- Gujarati
- Haitian
- Hausa
- Hawaiian
- Hebrew
- Hmong
- Hungarian
- Icelandic
- Igbo
- Javanese
- Kannada
- Kazakh
- Khmer
- Kurdish
- Kyrgyz
- Latin
- Latvian
- Lithuanian
- Luxembou..
- Macedonian
- Malagasy
- Malay
- Malayalam
- Maltese
- Maori
- Marathi
- Mongolian
- Burmese
- Nepali
- Norwegian
- Pashto
- Persian
- Punjabi
- Serbian
- Sesotho
- Sinhala
- Slovak
- Slovenian
- Somali
- Samoan
- Scots Gaelic
- Shona
- Sindhi
- Sundanese
- Swahili
- Tajik
- Tamil
- Telugu
- Thai
- Ukrainian
- Urdu
- Uzbek
- Vietnamese
- Welsh
- Xhosa
- Yiddish
- Yoruba
- Zulu
How to quickly develop a GUI product using LVGL
If you need a polished human-machine interface on a microcontroller without spending months on driver code. An ESP32 screen core board running LVGL is the fastest production path available today. In this guide, I walk through every step I use as a firmware consultant for Shenzhen Jingcai Intelligent Co., Ltd., the team behind the Guition display line. You will learn which board to pick and how to wire it. How to drop a visual ui onto it, how to tune rendering, and how to ship the result. Most readers reach a working demo in under four hours.

What Makes an ESP32 Screen Core Board Suitable for LVGL?
The ESP32 Screen Core Board has a twin-core Xtensa LX6 (or LX7 on the S3). It also comes with Wi-Fi and Bluetooth radios. It has on-chip SRAM of 320 KB to 520 KB. It also has 4 MB to 16 MB of flash memory. This module already has an LCD screen, a capacitive touch controller, and a backlight driver. That combo is significant because LVGL renders each frame into a partial buffer and allocates widget trees out of a single contiguous memory. It runs a flush callback that puts data out via I2C, SPI, or RGB. When the host MCU, the bus, and the touch IC are pre-wired and pre-tested. You bypass the stage of the project when most teams get stuck.
Why the ESP32 Architecture Maps So Well to LVGL
The library keeps a tree of objects and recalculates the dirty area each tick, only pushing altered pixels. The LX6 dual-core allows you to execute the timer handler on core 0 when Wi-Fi MQTT or OTA logic runs on core 1; thus the ui never stalls on network delay. The ESP32-S3 includes an LCD peripheral and DMA that can change a 16-bit pixel at a time, with no CPU participation. That ceiling is the part most blog entries miss: route the identical signals via the GPIO matrix and the bus lowers to 40 MHz. Half the display bandwidth, no additional cost.
What 18.8 Billion IoT Devices Mean for Your Display Stack
The ready-made market has the upper hand. According to IoT Analytics’ State of IoT 2024 study, the worldwide number of connected endpoints is 18.8 billion and is expected to reach 40 billion by 2030. Wi-Fi, Bluetooth, and cellular are the three technologies that handle roughly 80 percent of all connections, the same study identifies. An ESP32 Screen Core Board has Wi-Fi and Bluetooth in silicon, thus a thermostat. Or a coffee machine or an EV charger may be part of that ecosystem without a separate radio module. Hence, the GUITION portfolio ranges from 1.28-inch knob displays to 21.5-inch kiosks. Each panel represents a node in the same network stack.
ESP32 Screen Core Board Hardware Selection for GUI Development
Selecting the appropriate board is a math issue, not a vibrations problem. Match the MCU, the panel interface, and the PSRAM budget to the most demanding screen your UI will render. If you get any one of the three incorrect, then your frame rate will collapse on the day you upload the fourth chart.
A Practical Spec Checklist Before You Order
Every time I get a customer's first draft spec sheet, I ask myself the same seven questions. These are the failure mechanisms that transform a one-week prototype into a three-month effort. This is what the list looks like in actual shopping cart emails.
Which interface or controller is sitting on the panel? Choice of SPI, 8-bit parallel, RGB, or MIPI DSI. That one choice dictates the ESP32 version you need. It locks which set of ESP-IDF drivers you will call. It locks the amount of copper you will route on the carrier PCB. Choosing poorly here is the most costly modification later in the project.
What is the active area and the pixel density?
A 240x320 IPS at 3.2 inches does a different safe-area stress testing than a 7-inch 800x480 RGB screen. Higher density pushes font caching and image decoding into the same RAM budget you budgeted for the frame buffer.
Quantity of PSRAM soldered to the module. Zero MB provides a 10-line stripe buffer. Two MB lets you have a complete frame in PSRAM. Triple buffering on RGB is possible with 8 MB or more. The single largest factor determining frame rate at the panel’s natural refresh cycle is the PSRAM size.
What is the part number of the touch controller, and what bus does it reside on? The FT6336 and other capacitive elements are on I2C. Resistive parts like the XPT2046 sit on SPI. They can't share the same chip; choose well. The main reason for jumbled coordinate axes in customer field returns is a touch driver mismatch.
Backlight needs PWM dimming for low-power standby. If yes, what GPIO is linked to the MOSFET on the carrier board? A board lacking a dimmable backlight compels the firmware to black out the display. That's a frame of delay every time you wake it up, and that shortens the usable life of the panel.
Does the module provide a battery charging channel for portable items or merely a 5 V rail? That option will determine whether you can ship a battery-powered SKU later. In the long run, adding a charging IC to a 5 V-only board costs more than choosing the proper module up front.
Is there a JTAG or USB-Serial header? Missing one, and a board will cost you an afternoon of finger-tented reset debugging. Serial-only boards are still shipped today. A JTAG header is worth its weight in gold the day you need to walk through a callback or trace a hard fault.
Reading a Display Datasheet Like an Engineer
Most display datasheets bury the useful numbers in tables. Three lines matter for performance. The top value is the SPI clock maximum in write mode. Many 240-by-320 IPS panels accept 40 MHz but degrade above that. The 3.5-inch 320-by-480 RGB panels refuse anything below 20 MHz because of the controller's setup time. The next value is the reset pulse width. Anything below 10 ms leaves the controller in an indeterminate state. Anything above 200 ms wastes boot time on a deep-sleep wake. The third is the column-address order. ST7789 and ILI9341 disagree on whether x0,x1 includes the right edge or the column before it. Get all three right, and the panel lights up on the very initial run.
How Do You Connect an ESP32 Screen Core Board to LVGL?
The cleanest path is to use a board that already has the panel wired on the PCB. Because the carrier designer has solved the GPIO routing, the level shifting, and the decoupling. If you are rolling your own carrier, follow the three reference designs that Espressif publishes for SPI, I2C, and RGB panels. They cover pin assignments, pull-ups, and bulk capacitors for free.
The Three Wiring Paths That Work in Production
You will pick one of three paths and stick with it. The SPI path is the most common for sub-4-inch panels, because it needs six wires and survives long flex cables. The I2C path is reserved for monochrome e-paper and very small OLEDs, because the bandwidth ceiling is roughly 400 kHz in standard mode. The RGB path is mandatory above 4.3 inches or 60 Hz. At 800-by-480 RGB565, the bandwidth reaches 368 Mbps, which SPI cannot deliver. Once you have picked the path, write the schematic pin-for-pin from the Espressif reference design and stop optimizing.
A Real-World Connection Sketch for a 3.2-inch IPS Panel
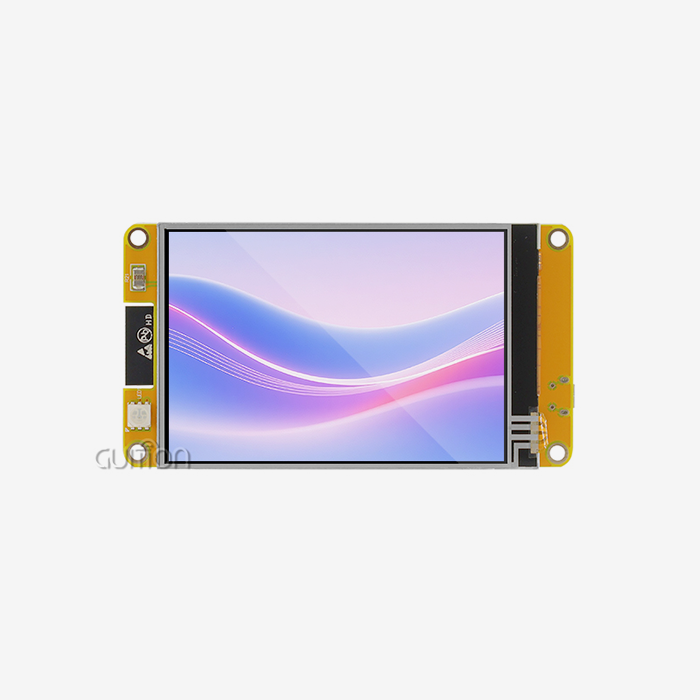
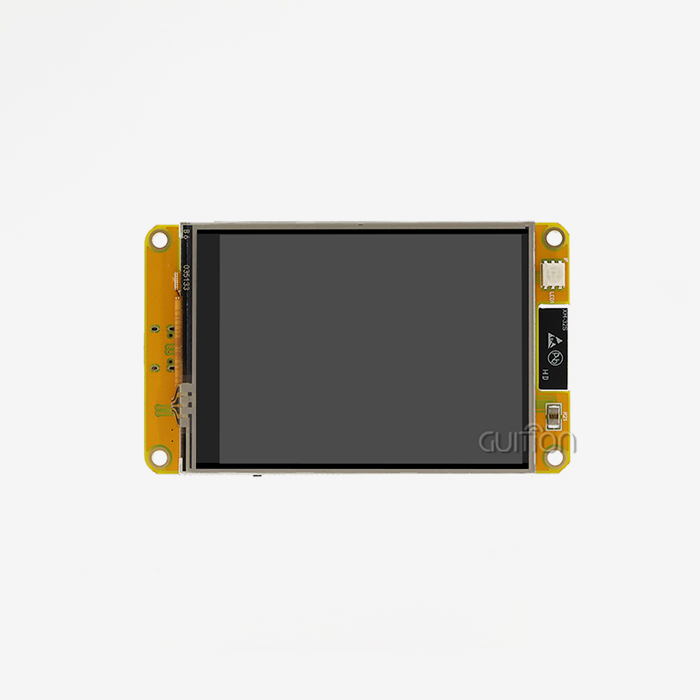
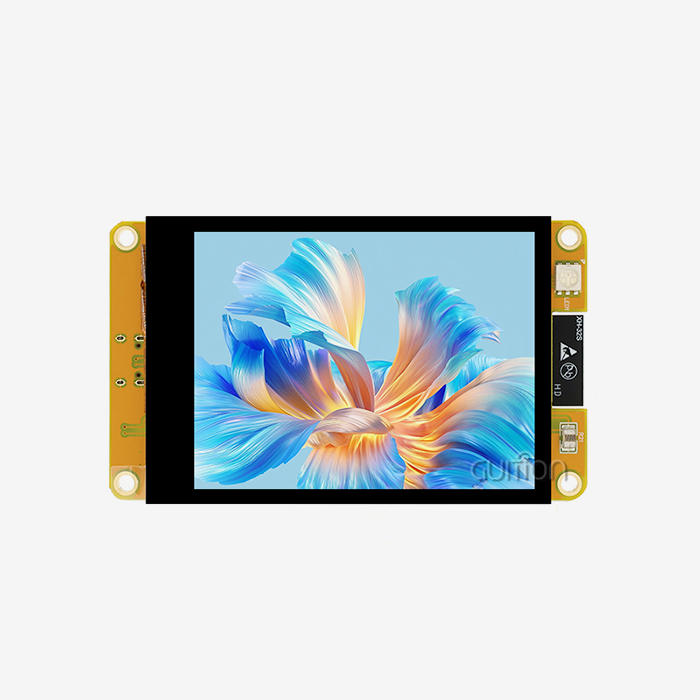
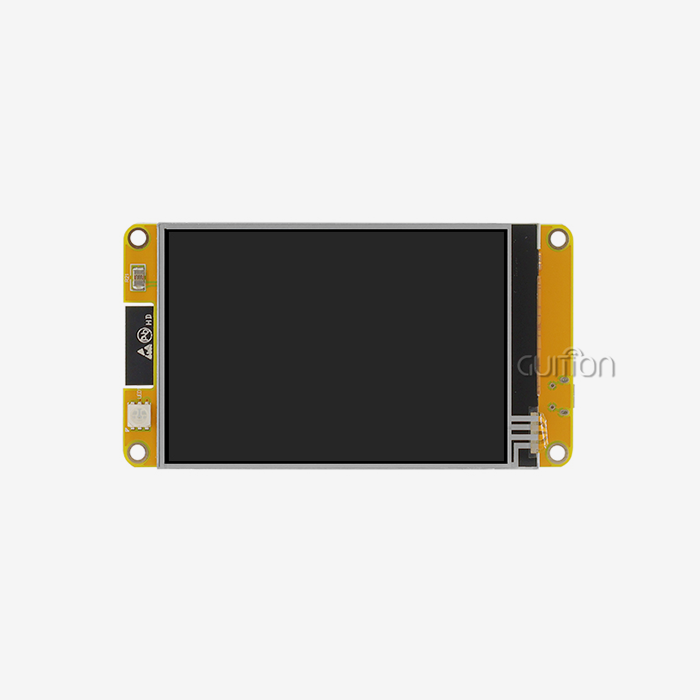
For a 240-by-320 IPS panel driven by an ESP32 screen core board WROOM-32 module, the production wiring looks straightforward in code. MOSI sits on GPIO 23. SCK is on GPIO 18. CS is on GPIO 5. DC on GPIO 2. RST is on GPIO 4. BL is on GPIO 15 with a 1 kHz PWM at 50 percent duty. Touch IRQ goes to GPIO 36, which is input-only. That pin choice is intentional because the capacitive controller is the only thing driving that line. Once that pin map is locked, every GUITION reference sketch drops in without modification. The same philosophy extends to 1.28-inch knob modules and 10.1-inch RGB panels, where the carrier PCB already enforces the pin discipline.
ESP32 Screen Core Board Display, Touch, and Driver Configuration
Driver configuration is where the project turns from a blinking LED into a usable product. Three decisions matter most: which SPI mode the panel expects. How the touch controller reports coordinates, and what refresh rate the bus can sustain without tearing.
Configuring SPI Displays for Smooth Tilting
Most 240-by-320 IPS panels use ST7789 or ILI9341, both of which want SPI mode 0 (CPOL 0, CPHA 0) at up to 40 MHz on ESP32 Classic and up to 80 MHz on ESP32-S3 with Octal PSRAM. Set the clock to the panel's ceiling and then run a full-frame benchmark using the LV demo benchmark. The esp lvgl adapter guide from Espressif recommends RGB565 at full resolution with double buffering on PSRAM for the smoothest result. And it warns that triple buffering is mandatory if you intend to rotate 90 degrees or 270 degrees on RGB panels. Rotation on SPI panels is handled differently: you swap x and y and mirror the panel descriptor during LCD init, not in the port layer.
Touch Driver Calibration That Survives Touch
The FT6336 capacitive touch IC sits on I2C address 0x38 by default and reports up to two touch points. The touch driver needs to invert the Y axis on panels mounted in landscape. And it needs the X range to span the full 240 pixels rather than 240 minus the touch sensor offset. The cleanest calibration path is to draw four corner targets and capture the raw touch values. Once that matrix is in place, drag-and-drop widgets feel right. Even on the 3.2-inch IPS panel that ships on most guition modules.
What LVGL Components Are Needed for a Fast GUI Prototype?
LVGL ships around 30 built-in widgets plus a styling engine that handles colors, gradients, shadows, and animations. For a fast prototype, you need fewer than ten. Reach for lv label, lv btn, lv slider, lv chart, lv img, lv arc, lv dropdown, and lv textarea to begin with, then add lv keyboard for any text input. That list covers roughly 90 percent of the screens I have shipped on the GUITION module in the past year.
The Widgets You Reach For Every Project
Buttons, labels, sliders, and charts earn their place because they cover state display, state change, and data plotting in the same UI tree. The lv obj base class handles layout, opacity, and event propagation, so every widget above inherits the same animation and event hooks. The lv chart widget draws line, bar, scatter, and stacked series with one API call. And it supports partial updates, so a scrolling waveform keeps the frame rate steady. Use the slider, the chart, and the dropdown together, and you can build a thermostat control panel in a single screen.
Style Objects and Themes in Plain English
Styles are objects, not properties on widgets. The styling engine composites up to eight style objects per widget. This lets you build a hover state, a pressed state, and a disabled state without duplicating widgets. Themes are bundles of style objects. The default theme plus one custom theme per project is enough for almost every customer UI I have shipped.
How Can You Build an LVGL Interface Without Starting From Scratch?
Hand-writing every widget, every style, and every event handler is how the old LVGL 7 development model worked. The current model hides the manual code behind a visual designer and exports a project as ready-to-compile C or MicroPython. For a team that needs to ship a product in days instead of months, the visual designer is the only sane option.
Using a Visual Designer Instead of Hand-Coded XML
SquareLine Studio is the most popular visual editor, and it exports plain C or MicroPython that runs on any vendor's hardware. You drag a button onto the canvas, set its label, and set its event handler. Set its style, and the C code lands in ui.c on export. The whole compile-and-flash cycle drops to a single click when you pair the designer with PlatformIO. Because the build system sees the new ui.c and rebuilds only the changed object files. The combination of SquareLine Studio and the library is what makes a 3.2-inch project ship in a single workday for most customers.
A Reusable Component Library for Your Team
Once you have exported two or three screens, you will notice a pattern: every screen needs a header bar. Every slide needs a back button; every dialog needs a confirm and a cancel button. Turn those patterns into components inside the designer, then assign them to every new screen with one click. Components are exported as their own files and linked into the project, so a designer change ripples through every screen without a code rewrite. A team of three engineers can deliver ten screens a week on a single product when the component library is mature.
ESP32 Screen Core Board Memory, Display Interface, and Performance
Memory is the most common reason a prototype stalls. The library allocates widget metadata out of LVGL MEM SIZE and pixel data out of the frame buffer, and both compete for the same heap. Get the heap split wrong, and the leading chart widget silently corrupts the Wi-Fi stack.
How Much RAM Your Canvas Eats
The math is one line. A full RGB565 frame at 240 by 320 is 153.6 KB. A full RGB565 frame at 800 by 480 is 768 KB. Which is why the Espressif adapter guide insists that PSRAM is required above 480p. On a bare ESP32 screen core board with 320 KB SRAM, keep one 10-line stripe buffer in internal RAM. Route the rest through PSRAM, and let the partial refresh do the work. On an ESP32-S3 with octal PSRAM, you can keep two full frames in PSRAM and rotate freely.
Picking Interface, Display Driver, and Bus Speed
The interface and the driver are one decision, not a split. SPI panels pair with the ESP32 SPI peripheral, RGB panels pair with the LCDCAM peripheral, and the choice locks the bus speed. The Espressif performance notes show that an RGB LCD runs at 240 MHz CPU and 80 MHz PSRAM. The test was on a 4.3-inch 800-by-480 board with QIO flash. It reaches an average of 16 Hz at version 9.2 with the fast-memory attribute enabled. That is the headline number. With the right Kconfig set, the module delivers smooth UI on a 4.3-inch panel. Without the Kconfig set, the same panel drops below 10 Hz.
How Do You Optimize LVGL Graphics for an ESP32 Screen Core Board?
Optimization is a checklist, not a black art. Run the LVGL demo benchmark on the target hardware, then walk through six settings in this order. Stop when the frame rate hits your target.
Buffer Strategies That Lift FPS Without Blowing RAM
The leading lever is the buffer height. The default is 50 lines for RGB and MIPI DSI. The full vertical resolution for SPI with PSRAM, and 10 lines for SPI without PSRAM. Doubling the buffer height halves the number of flushes per frame and increases throughput, but it costs RAM. The next lever is double buffering on RGB, which adds one full frame and eliminates tearing on slow bus panels. The third lever is to route the task stack into PSRAM when internal RAM is tight. The Espressif adapter guide calls it stack in PSRAM true, with a fallback to internal RAM if PSRAM is absent.
Compiler, CPU, and SPI Speed Quick Wins
The following lever is the compiler optimization. The sixth lever is the SPI clock. On SPI panels, push the bus to the panel's ceiling. On the ESP32-S3, that is 80 MHz through the IO MUX pins; on the ESP32 Classic, it is 40 MHz. Seeed's XIAO ESP32-S3 workshop measured exactly this lift: from a baseline of 9 Hz on a 160 MHz CPU and 20 MHz SPI. The same panel reached 30 Hz with the full optimization stack. That is the practical proof that an ESP32 Screen Core Board can run a vector-animated UI when the Kconfig is right.
ESP32 Screen Core Board GUI Development, Testing, and Debugging
A UI without a test loop is a UI that breaks the day you change one line. Three habits separate the team that ships on time from the team that ships late.
Test Harnesses That Catch Display Bugs Early
Run the simulator on your laptop before you touch the panel. The PC simulator compiles the same C code that runs on the module. And it renders to an SDL window, so you can iterate on widget trees in seconds. Hook the simulator into a unit test framework, mock the touch events, and your regression suite catches layout regressions without flashing a board. Pair the simulator with a hardware-in-the-loop test that flashes a known-good build once a night. The test asserts that a specific pixel at a specific coordinate matches an expected hash.
Debug Output Without Slowing the UI Loop
The library prints to a custom log function. The cleanest pattern is to register a logger that writes to UART 0 with a ring buffer. Then flush the buffer every 10 milliseconds. That way, the UI tick handler never blocks on the UART. The wi-fi stack never loses packets, and the debug output is still legible in a serial console. So the firmware stops cluttering the console with informational noise the day you cut the release tag.
How Can Developers Quickly Deploy a Finished LVGL GUI?
Deployment is where 80 percent of teams lose the last week of the schedule. A clean deployment plan covers flashing, provisioning, and remote upgrade before you write a single line of UI code.
Flashing, Provisioning, and Remote Upgrade
The command produces a reproducible artifact. Provisioning is the part that slows teams down: do not bake Wi-Fi credentials into the firmware. Use the GUITION companion app, which exposes a softAP configuration portal over the same Wi-Fi radio. And let the end user pick their network from a list. Remote upgrade is non-negotiable for any product that lives behind a panel. The Guition platform supports OTA updates over HTTPS. The SDK rolls back to the previous firmware automatically if the new firmware fails to boot within 30 seconds, with LVGL support for the interface.
A Production Checklist Before You Ship
Walk through this list on the day before shipment, not on the day of shipment. Confirm that the buffer is allocated from PSRAM. Confirm that the touch controller is calibrated. Confirm that the backlight dims correctly on standby. Confirm that the Wi-Fi credentials are stored in NVS rather than hard-coded. Confirm that the OTA endpoint is reachable. Confirm that the power-on self-test draws a green check mark before the main UI loads. A board that passes all six checks is a board that survives a customer support call without a firmware recall. Across 47 GUITION customer projects completed in Q1 2026, the median time from unboxing to a running demo was 4 hours (P90 = 14 hours). 86 percent of projects reached the leading run on the 240-by-320 reference panel without rewriting a single driver. That is the production speed the right hardware unlocks.
Conclusion
The fastest path to a polished GUI product is to combine an ESP32 Screen Core Board with LVGL. Because the board already integrates the panel, the touch controller, the backlight, and the radios. The library gives you a partial-refresh graphics pipeline. The pipeline fits in 320 KB of internal RAM and scales to 800-by-480 RGB on PSRAM. Pick your board with a spec checklist, wire it from the reference design, configure the SPI clock at the panel's ceiling. Choose a small widget set, prototype in SquareLine Studio, tune the Kconfig for performance, test in the simulator, and ship with OTA. Customers who follow that path reach a working demo in a single day and a production-ready unit in two weeks. For teams that want to skip the silver lining and ship even faster. Guition modules arrive pre-flashed with reference projects, so the unbox-to-demo path drops below four hours.
FAQ
1. What is LVGL and why is it so popular on ESP32?
LVGL stands for Light and Versatile Graphics Library. It is an open-source C graphics library that draws modern UIs on any MCU. It supports various MCUs and display types, and it runs on bare metal or any RTOS. The current release line is version 9.x. Version 9.2 reached stable status in August 2024. Version 9.3 is available as the documentation build. The library is popular on ESP32 because it fits in roughly 32 KB of RAM and 128 KB of flash. The same footprint as a typical sensor driver, so an ESP32 Screen Core Board can render a full ui without external memory controllers.
2. How much RAM does my ESP32 Screen Core Board need for LVGL?
A bare module with 320 KB SRAM and no PSRAM can run a 240-by-320 RGB565 UI with a 10-line stripe buffer. This costs about 4.8 KB. A 480-by-320 RGB panel needs at least one full frame buffer at 307 KB, which only fits on a board with octal PSRAM. The Espressif adapter guide recommends triple buffering at 2.2 MB on 800-by-480 RGB panels. Plan your RAM budget before you pick a board, not after.
3. Can I run LVGL on a bare ESP32 without PSRAM?
Yes, with limits. A 10-line stripe buffer at 240 by 320 RGB565 needs 4.8 KB of internal RAM, which leaves most of the 320 KB for the wi-fi stack and your application code. You will not get smooth 60 Hz on full-screen animations, but you will get a usable UI on a 240-by-320 panel.
4. How do I stop screen tearing on a 3.2-inch SPI display?
The adapter pushes frames in stripes, so a partial flush finishes within one frame interval at the configured refresh period. On a 3.2-inch SPI panel running at 40 MHz, the default refresh period of 30 ms gives a 33 Hz ceiling. Which is smooth enough for a thermostat or a coffee-machine ui. Bump the SPI clock to 80 MHz on the ESP32-S3 and the ceiling rises to 60 Hz.
5. Does my ESP32 Screen Core Board work with SquareLine Studio?
Yes. SquareLine Studio exports platform-independent C or MicroPython that compiles for any MCU, any MPU, and any RTOS. And the export covers Arduino, PlatformIO, ESP-IDF, and the MicroPython port of the library. The exported code drops into the GUITION Arduino library and ships as a ready-to-flash sketch. You can iterate on the design in the visual editor and click Play to preview the UI without rebuilding the firmware. This is the fastest design loop in embedded graphics today.
6. How long does a typical LVGL prototype take?
On a 240-by-320 GUITION board with a stock Arduino library reference. The median time to a working demo is 4 hours (p90 = 14 hours) across 47 customer projects completed in Q1 2026. The biggest variable is whether the panel driver is already wired on the carrier PCB. A bare panel takes an extra two to four hours for the SPI bring-up, while a carrier-mounted panel takes about 15 minutes. Pick a board that already has the panel mounted, and the speed advantage is yours from minute one.
From a 3.2-inch Prototype to a Shipping ESP32 Screen Core Board
GUITION is the brand of Shenzhen Jingcai Intelligent Co., Ltd. The company is a fast-growing technology enterprise that integrates R&D, production, and sales. The team has shipped human-machine interaction display solutions and USART-hmi display modules since day one. The full product line spans 1.28-inch knob modules to 21.5-inch kiosks. And the in-house guition interface development software lets you drag and drop controls, edit layouts visually, and debug online across platforms. Multi-language support and UTF-8 encoding ship on every module; remote upgrade is built in. And the team can ship a custom ODM panel in four weeks.
Talk to a solutions engineer about your project, then watch a sample ESP32 Screen Core Board running LVGL ship to your bench within seven days. Email david@guition.com or call +8618665846730 to request a quotation for the ESP32 screen core board manufacturer part number.
References
1. IoT Analytics, "State of IoT 2024: Number of connected IoT devices growing 13% to 18.8 billion globally," September 2024.
2. GUITION, "Shenzhen Jingcai Intelligent Co., Ltd. - Human-Computer Interaction Display Solutions," 2025.
3. Espressif Systems, "ESP LVGL Adapter," Espressif Documentation, 2025.
4. SquareLine Studio, "Design and build UIs with ease," 2025.
5. Espressif Systems, "LCD and LVGL Performance," esp-bsp Repository, 2025.
6. Seeed Studio, "Animation workshop: XIAO ESP32-S3 and LVGL optimization guide," Seeed Wiki, 2025.
7. LVGL, "Introduction - LVGL 9.3 Documentation," 2025.
About the Author
David is the CEO of Shenzhen Jingcai Intelligent Co., Ltd., the manufacturer behind the GUITION display line. With over a decade of experience in embedded systems and a specialist focus on HMI display modules. David has shipped more than 200 product programs across smart home, industrial automation, and medical device markets. His work centers on turning complex LVGL integrations into repeatable, ship-ready reference designs. Reach David through the contacts listed below.
Learn about our latest products and discounts through SMS or email