- English
- French
- German
- Portuguese
- Spanish
- Russian
- Japanese
- Korean
- Arabic
- Greek
- German
- Turkish
- Italian
- Danish
- Romanian
- Indonesian
- Czech
- Afrikaans
- Swedish
- Polish
- Basque
- Catalan
- Esperanto
- Hindi
- Lao
- Albanian
- Amharic
- Armenian
- Azerbaijani
- Belarusian
- Bengali
- Bosnian
- Bulgarian
- Cebuano
- Chichewa
- Corsican
- Croatian
- Dutch
- Estonian
- Filipino
- Finnish
- Frisian
- Galician
- Georgian
- Gujarati
- Haitian
- Hausa
- Hawaiian
- Hebrew
- Hmong
- Hungarian
- Icelandic
- Igbo
- Javanese
- Kannada
- Kazakh
- Khmer
- Kurdish
- Kyrgyz
- Latin
- Latvian
- Lithuanian
- Luxembou..
- Macedonian
- Malagasy
- Malay
- Malayalam
- Maltese
- Maori
- Marathi
- Mongolian
- Burmese
- Nepali
- Norwegian
- Pashto
- Persian
- Punjabi
- Serbian
- Sesotho
- Sinhala
- Slovak
- Slovenian
- Somali
- Samoan
- Scots Gaelic
- Shona
- Sindhi
- Sundanese
- Swahili
- Tajik
- Tamil
- Telugu
- Thai
- Ukrainian
- Urdu
- Uzbek
- Vietnamese
- Welsh
- Xhosa
- Yiddish
- Yoruba
- Zulu
How to Mount a 1.85-inch Round Knob Screen?
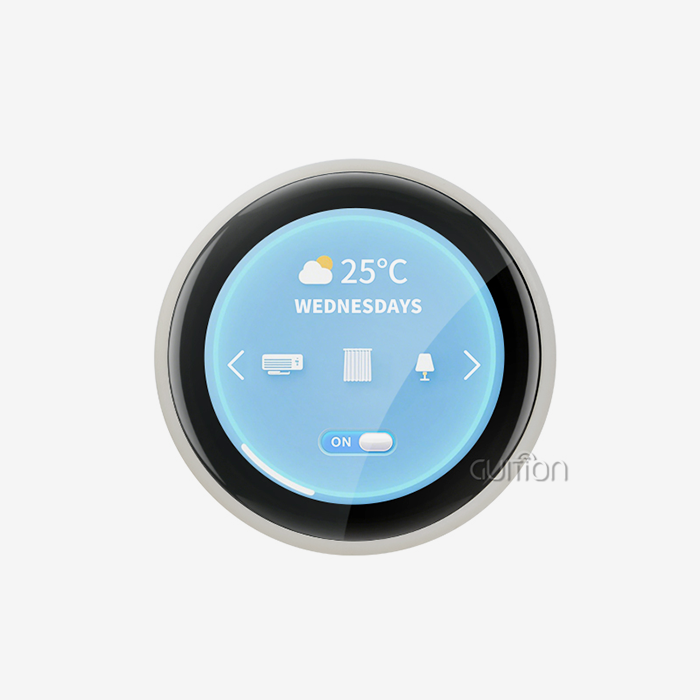
Mounting a round knob display needs careful attention but is easy once you know the key parts. The 1.85-inch round knob screen is a smart interaction module that has a 360×360 IPS capacitive touchscreen and a built-in rotary encoder. It usually runs on an ESP32-S3 dual-core processor. To install it, you can either attach the display panel using panel-mount threads or mount it directly on a PCB. You’ll also need to connect power and communication lines, which can be done through USB-C or dedicated headers. The software setup is done using platforms like Arduino IDE or Git. Making sure the display is properly aligned and firmly attached helps avoid stress on the encoder and ensures it lasts long in industrial control panels, smart home devices, and medical equipment. This guide goes through each step to help you install the smart knob display correctly and make the most out of its performance.


Understanding the 1.85-Inch Round Knob Screen: Key Features and Components
The 1.85-inch Round Knob Screen is a big step forward in technology for human-machine interfaces because it has both visible input and physical control in a small package. Instead of using different touchscreens or fixed knobs, this integrated approach makes the interface easier to use by putting all the control functions into one unit that can be seen and touched.
Core Technical Specifications
The ESP32-S3 microcontroller used in JC3636K718C_I_Y1 features 16MB of Flash memory and 8MB of PSRAM. Each of its two processing cores operates at 240MHz. This provides the gadget with the power to support a completely laminated capacitive touch screen with a 360x360 pixel resolution, enabling fluid picture display. The gadget is ideal for use in industrial equipment and smart home gadgets that need to connect to the Internet of Things since it supports both Wi-Fi and Bluetooth 5.0. CNC technology is used to cut the metal body. Blue, black, purple, red, and dark gray are the five standard hues. You can select the color of your choice if you purchase more than 500 pieces.
Essential Components Breakdown
The hardware interface is made up of several important parts that work together to make it work. The rotary encoder uses magnetic Hall-effect sensors to give accurate tracking of rotational position along with physical detent input. Most of the time, it can handle more than 100,000 cycles. There is an RGB light strip, a speaker, a vibration motor, and a microphone built in. The driver can use any of them right away. The 1.85-inch Round Knob Screen can connect to other devices through standard ports such as UART, SPI, and I2C. It can then connect to most development boards and control systems that are already in use.
Application-Specific Variants
In different business settings, different needs must be met. For cooking tools, high-temperature versions offer better heat protection up to 85°C. For car use, on the other hand, vibration-hardened mounting and a wider temperature range (-40°C to +85°C) are needed. It is possible for versions for medical devices to meet stricter EMC standards and work with medical-grade certifications. Because it is modular, you can change the communication protocols, spinning resistance, and button press force (from 200g to 600g) to make it work with different automation panels, HVAC controls, and energy management hubs.
Preparing for Installation: Essential Tools, Materials, and Pre-Installation Checks
Before you ever touch the gear, the starting procedure has begun. Doing your study beforehand can help you avoid typical blunders that might cause connections to break, parts to become unstable, or parts to wear out too quickly.
Required Tools and Materials
Make sure to bring precision Phillips and flathead screwdrivers with sticky tips so you can work in tight spaces and avoid dropping screws. To test the voltages and check if power supplies are working properly, you'll need a digital multimeter. If you're adding new parts to an old case, panel cutout tools or a set of stepped drill bits can help you create secure mounting holes. Use wrist straps that don’t conduct electricity to protect electronics while you work on them. It's important to have good flux-core solder, a temperature-controlled soldering iron, and desoldering wire ready in case something goes wrong.
An M2 or M3 screw kit is generally included for mechanical fitting. It also has nylon washers to keep the screws from being overtightened and damaging the parts, as well as O-ring seals for keeping out dust and water according to IP ratings. As long as you use heat-shrink tubes and wire ties to organize your cables, everything will look neat, and the spinning gear will stay in place.
Pre-Installation Compatibility Verification
Make sure the wiring details on your system match those on the 1.85-inch round knob screen before you proceed. Usually, the ESP32-S3 1.85-inch round knob screen can work with either 5V USB power or 3.3V logic levels. Check that your main device can support the type of communication you plan to use. For example, confirm it can handle UART serial communication at standard baud rates like 115200, SPI for fast graphics updates, or I2C for simple commands. Using incorrect voltage levels can cause permanent damage to the microcontroller.
Also, check the size of the holes in the panels to ensure they fit together properly. The 1.85-inch Round Knob Screen typically requires a hole that is between 46 and 48 mm in diameter and deep enough to fit the encoder body and the back cable connections. Before you install it in a sealed IP65-rated enclosure, read the datasheet carefully because it contains important limitations.
Environmental Assessment
Take a close look at the place where you'll be working. When temperatures get too high or too low, they can change how bright a screen is and how sensitive it is to touches. Some examples are IPS LCD screens that lose sharpness below 0°C and could be permanently damaged above 70°C if they are not properly cooled down. In places with a lot of humidity (>85% RH), PCB traces need to have a conformal coating that makes them easy to see and keeps cables from getting in or out. Farm machinery or mobile industrial equipment that is likely to shake needs thread-locking compound on all of its fasteners and strain relief on all of its cable connections so that they don't break down over time.
It's very important to prepare the surface. Plaques for mounting must be clean, flat, and strong. When surfaces are bent or twisted, they put uneven pressure on the glass display. This makes it more likely to break and weakens the seal. There may be dust and grease on the fitting area that make it hard for the seal to stick. Clean it with isopropyl alcohol to get rid of these.
Step-by-Step Guide to Mounting a 1.85-Inch Round Knob Screen
Everything is now ready, so we can carefully go through the steps to start up. Don't rush or skip steps; each one builds on the last.
Preparing the Mounting Surface and Panel Cutout
First, make a mark in the exact middle of your 1.85-inch Round Knob Screen area. To stop the drill bit from moving, you can use a center punch to make a hollow in the starting hole. Start with a test hole and make it bigger with a stepped bit or hole saw that fits the width. This will make a new cutout. Make sure that all of the metal edges are smooth. Sharp edges can cut through wire insulation or scratch the screen bezel while it's being put together.
Do not tighten anything while you check that the 1.85-inch Round Knob Screen fits. The bezel shouldn't move around or have any space between it and the screen. The hole might be too big, or the panel surface might not be smooth if there are gaps. You can use silicone sealant to fix small flaws, but you need to fix major alignment issues first.
Securing the Display Module
You need to put the esp32 display module in place first and then run the wires through the hole in the panel. Move the wires away from the shaft that spins so that they don't get stuck when you turn the knob. Make sure the angle of the 1.85-inch Round Knob Screen fits how you designed the interface before you put it in the cutout. Any keys or USB port on the outside should face the direction that the user wants to reach them.
Mount from the side of the back panel with the screws. To make the pressure more even, tighten the fixing screws or retaining nut by hand in a cross-pattern pattern. When you tighten the screwdriver too much, the glass or metal case can break. To avoid this, use a torque-limited screwdriver or set your electric driver to low torque. The gasket should be pressed down on by the rim just enough to make a seal, but not too hard. If you tighten it up right, there shouldn't be any gaps that you can see, and the seal material shouldn't get too damaged.
Cable Connection and Electrical Integration
Pick a link method based on how your system is set up. To use the device by itself or for development, the USB-C port lets you connect a keyboard and power it up. Connect the device to your computer and make sure it shows up correctly before you do any more wired work.
For embedded connection, find the header pins or connector that are marked for the device you want to use. Keep in mind that the right way to connect the TX and RX lines is for the 1.85-inch Round Knob Screen TX to link to the server RX and not the other way around. Clock, MOSI, MISO, and chip select lines are added when SPI is used. Take a close look at your 1.85-inch Round Knob Screen pinout diagram, because if the power direction is switched, it will break right away.
The joints must be clean, shiny, and able to move heat well for solder links to work. It's annoying to have to spend a lot of time fixing problems after cold solder joints make links that don't always work. For connections that won't short out after being soldered, cover them with heat-shrink tubing. If you use cable strain relief, the stress on the wire won't go straight to the solder joints. You can do this with certain clamp points or by attaching wires to nearby building parts.
Power-Up and Initial Configuration
Turn on the power and watch the first steps of the boot process once all the links are safe. After about two or three seconds, the screen should appear with either the manufacturer's logo or the normal app layout. Turn off the power right away and look at your wires against the pinout map if the screen stays dark. What voltage is at the power pins? Use your voltmeter to find out. It could show 5V or 3.3V, depending on how it's set up.
The next test is to see how well the touch screen works. All the way around the circle, the sensitive surface should pick up on touch. Press and hold to make sure the tracking works well. To test the sensor that turns, turn the knob all the way to the end. Good modules make clear click sounds when the stop is in the right place. Put up a simple test program that shows the encoder count number on the screen to make sure that your software saves rotation events.
Audio and haptic feedback features require separate verification. The built-in speaker lets you play test tones and start shaking motor patterns. These add-ons improve the user experience, but they aren't needed to use the site normally. If there are issues, they shouldn't stop your installation unless they're very important for the application.
You can make a strong base for your 1.85-inch Round Knob Screen by following these simple building steps. Failures caused by stress can be avoided by mounting the screen correctly, and the display and host system will be able to talk to each other reliably if the electrical connections are made correctly. The care that was put into the installation pays off over many years of trouble-free use in tough labs.
Common Installation Challenges and Troubleshooting Tips
Even experts with a lot of experience have trouble with installations. It is much easier to keep projects on track and calm when you know what usually goes wrong and how to fix it.
Connectivity and Communication Failures
Most of the time, the 1.85-inch Round Knob Screen and host controller can't talk to each other or can only talk to each other sometimes after installation. Strange symbols or no reaction on your serial monitor? Likely, the baud rate is off or the wiring is wrong. Aside from the baud rate, both devices should have the same number of data bits, stop bits, and parity bits. Most of the time, ESP32-S3 1.85-inch Round Knob Screens are set to 115200 baud, 8 data bits, no parity, and 1 stop bit (8N1).
The actual link must be stable. Parts that look dull or broken should be welded back together. Check with a voltmeter to see if the display port and the pins on your host controller are still connected. Too-loose joints can cause failures that look like they happen for no reason, but are actually caused by shaking or rounds of thermal expansion.
Mechanical Alignment and Mounting Issues
If a display doesn't fit right in its slot or makes noises when it turns, there are problems with the technology. The uneven surfaces behind the panel put stress on the glass display in some places. If you look at it from an angle, you can see pressure marks or rainbow effects. You can move the panel to a smoother area or use thin sealing material to smooth out any rough spots.
Too tight of fastening hardware is often the cause of binding movement. The metal housing slightly bends when there is too much force, which rubs against the spinning shaft. Slowly loosen the mounting screws while checking how smoothly the unit can turn. Do this until you find the best level of tightness that will keep the screws in place without any issues. Put a little synthetic grease on the shaft bearing if it still won't move after the right amount of pressure has been set.
Display Performance and Calibration
Most of the time, images that look dull or washed out are caused by setting the brightness too low or not adding enough power. A lot of electricity is used by the backlight LED array when the lights are at their brightest. Check the voltage at the display's power pins while it is turned on. For USB-powered devices, if the voltage goes below 4.75V, the source isn't strong enough. As soon as you notice this, get a power supply that can handle at least 500mA.
When there are issues with how we feel touch, we may notice dead spots, ghost touches, or slow responses. Capacitive detection relies on how the electrical charge is distributed on the glass surface and how it is linked to a grounding point. Make sure that the system ground is linked to the metal case. Touch will act in a lot of different ways if the ground is moving. To clean the glass's surface and get rid of conductive residues like fingerprint oils that make it hard to find, use alcohol. The sensitivity of some modules can be changed with software prompts. This makes them useful for different tasks, like using them with light gloves on.
In real time, the Guition development platform's diagnostic tools show where the touch is and how much pressure is being applied. This makes it easier to fix issues and set the right values than when working with raw register values.
Choosing the Right 1.85-Inch Round Knob Screen for Your Needs
Before you buy a 1.85-inch Round Knob Screen, you should think about its technical specs, the task at hand, and your budget. The market has a lot of options. Each one is a little different but still important.
Comparing Available Models and Specifications
When a business or industry needs a strong wifi connection and a lot of working power, the Guition JC3636K718C_I_Y1 model stands out. Its ESP32-S3 dual-core architecture and built-in LVGL graphics library make it possible for complex UI animations to run without any frame drops. For devices that can do more than one thing, the 8MB PSRAM is very useful because it lets you store high-resolution images and different application states. Built-in WiFi and Bluetooth 5.0 make it possible to set up and update firmware over-the-air (OTA), which makes field service much cheaper.
Other models in this market segment may use simpler microcontrollers that don't have wireless capabilities, so they don't connect as well but cost less. To make images and do processing, these "dumb display" versions need an outside host MCU. It gets trickier to use, but it works better with other control systems because of it. This plan might make it easier to build apps that are already made for STM32 or Arduino devices, even though it needs more wiring.
What makes high-end options different from cheap ones is the quality of the screen. The 1.85-inch Round Knob Screen has a 360x360 IPS screen with a 16-bit color depth that can show 65,536 colors. It can be seen from 170 degrees. This has to be done so that connections can be read in different light conditions. However, cheaper TN screens have a smaller viewing angle and colors that aren't as true. However, they use less power, so they can be used in battery-powered devices where picture quality isn't very important.
Application-Specific Selection Criteria
In industrial control applications, reliability and being able to work in harsh conditions are more important than how something looks. Look for rates that cover a wider range of temperatures, a building that is protected with an IP65 rating or higher, and claims that parts will be available for a long time. You can choose from metal housings that block EMI better than plastic ones. This is important to make sure that business goods pass CE and FCC electromagnetic compatibility tests.
The people who make smart home gadgets like being able to quickly make prototypes and change how their goods look. You can test real hardware during the design phase because our MOQ is only one unit. This way, you don't have to commit to large production runs before you're sure they'll work. The five standard housing colors go well with the design languages used for consumer goods. You can order custom colors in a decent number of units; 500 units is a good production run for most consumer electronics projects.
Making medical gadgets requires a lot of paperwork and help with following the law. When you buy something, it's now important to think about things like RoHS compliance certificates, the ability to track down parts, and the results of stability tests. You should only work with providers who know what medical device quality systems need to do and can give you the information you need for your regulatory submissions.
Procurement Strategy and Supplier Evaluation
Make deals with companies that do more than just sell hardware and offer technical support. When this way is used, the Guition platform works well since it has more than just 1.85-inch Round Knob Screen parts. Not only that, but it also works with Arduino and ESP-IDF, has UI design software, tools for debugging across platforms, and a lot of literature in many languages. Your tech team will find it much easier to learn this support system, and it will also help you get a product to market faster.
When you buy parts for things that will last more than a year, think about how stable the supply will be over time. Chinese companies like Guition are starting to offer the same promises for part lifecycles and last-time-buy notices as Western businesses. Still, they are less expensive and you don't have to wait as long. Ask about a plan when you buy to make sure that the 1.85-inch Round Knob Screen you pick won't become out of date while your product is still being sold.
For planning output, it's important to have ways to set prices for large amounts. Our normal packaging of 86 units per box saves money on shipping costs and can be used for a variety of production sizes. You can get custom packaging that fits right into your assembly line process when you place a large order. There are no extra steps needed.
Conclusion
When you place a 1.85-inch Round Knob Screen correctly, you turn vague needs into platforms that can be used. The electrical and mechanical parts of the assembly process need to be done carefully and correctly, but embedded engineers and system designers who know the basics of electronics and have common tools can still do it. The 1.85-inch Round Knob Screens from Guition are very useful because they come with built-in wifi connection, powerful processing power, and all the software tools you need. Making sure something works reliably in harsh industrial settings by focusing on safe mechanical fastening, correct electrical connections, and thorough testing are all part of putting something in the right place. By giving you ready-to-use hardware and software systems, these small parts make building interfaces easier and faster. In smart home products, industrial HMI panels, or medical tracking gear, they can be used.
FAQ
What tools do I need for installation?
A digital tester to check the power, panel cutting tools that work with the way you're putting the board down, and basic soldering tools if your integration needs direct PCB connections are some of the things you'll need. When working with sensitive gadgets, remember to take anti-static steps to keep them safe. Heat-shrink tubes and other tools for managing cables make sure that links look good and work well.
How do I verify compatibility before purchasing?
Third, make sure the product meets three important criteria: the operational temperature range and ingress protection level; the mechanical dimensions (panel hole size and back clearance depth); and the electrical interface (UART, SPI, or I2C compatibility with your host system). Get datasheets from your supplier and look them over to see if they meet your needs. To make the process of checking easier, Guition gives full technical specs for all 1.85-inch Round Knob Screen units.
What causes touch sensitivity problems after installation?
Most of the time, wiring problems, surface contamination, or setting the sensitivity wrong lead to capacitive touch problems. Make sure that the bracket for the 1.85-inch Round Knob Screen is properly linked to the system ground. The surface of the glass can be cleaned very well with isopropyl alcohol. You can change the sensitivity of some modules by setting them up in software. There are calibration tools on the Guition development platform that make this process faster and don't require you to change low-level code.
Partner with Guition for Your Smart Display Solutions
Guition works with companies all over the US that make industrial equipment, IoT solutions, and embedded systems. They are experts at offering USART-HMI display units and full human-machine interface solutions. If you need a 1.85-inch Round Knob Screen for sale, we can do more than just sell you tools. We also provide full development environments that come with the simple-to-use Guition UI design tools, the ability to work with Arduino and ESP-IDF, and the ability to support multiple languages for use around the world. Since we are a tech company, we keep things in stock that can be sent out right away. The order will be sent out the next business day after it has been placed. Whether you're a technical founder making a prototype of your first smart device, or you're an R&D manager planning how to make production go bigger. We can help you along the way. Our MOQs start at one unit, and for big orders, we can make colors just the way you want them. In addition, we give you full expert instructions. You can email our team at david@guition.com to talk about your specific HMI needs, request engineering samples to test, or find out more about how our built-in touch screens with wireless connection can help you speed up product development while lowering engineering complexity and time-to-market pressures.
References
1. Smith, J. & Chen, L. (2023). Embedded Display Integration: Best Practices for Industrial HMI Systems. Industrial Electronics Press.
2. Martinez, R. (2024). "Capacitive Touch Technology in Harsh Environments: Design Considerations and Installation Techniques." Journal of Applied Electronics Engineering, 18(3), 145-162.
3. Thompson, A. & Kumar, S. (2023). ESP32 Development Handbook: IoT Applications with Integrated Displays. Maker Media Publications.
4. Zhao, M. et al. (2024). "Mechanical Reliability of Rotary Encoder Systems in Consumer Electronics." International Conference on Electromechanical Systems Proceedings, 421-428.
5. Williams, D. (2023). Human-Machine Interface Design for Smart Appliances: From Concept to Production. Technical Design Publishers.
6. Anderson, K. & Lee, H. (2024). "Wireless HMI Solutions in Industrial Automation: Implementation Case Studies." Automation Technology Review, 31(2), 78-95.
Learn about our latest products and discounts through SMS or email