- English
- French
- German
- Portuguese
- Spanish
- Russian
- Japanese
- Korean
- Arabic
- Greek
- German
- Turkish
- Italian
- Danish
- Romanian
- Indonesian
- Czech
- Afrikaans
- Swedish
- Polish
- Basque
- Catalan
- Esperanto
- Hindi
- Lao
- Albanian
- Amharic
- Armenian
- Azerbaijani
- Belarusian
- Bengali
- Bosnian
- Bulgarian
- Cebuano
- Chichewa
- Corsican
- Croatian
- Dutch
- Estonian
- Filipino
- Finnish
- Frisian
- Galician
- Georgian
- Gujarati
- Haitian
- Hausa
- Hawaiian
- Hebrew
- Hmong
- Hungarian
- Icelandic
- Igbo
- Javanese
- Kannada
- Kazakh
- Khmer
- Kurdish
- Kyrgyz
- Latin
- Latvian
- Lithuanian
- Luxembou..
- Macedonian
- Malagasy
- Malay
- Malayalam
- Maltese
- Maori
- Marathi
- Mongolian
- Burmese
- Nepali
- Norwegian
- Pashto
- Persian
- Punjabi
- Serbian
- Sesotho
- Sinhala
- Slovak
- Slovenian
- Somali
- Samoan
- Scots Gaelic
- Shona
- Sindhi
- Sundanese
- Swahili
- Tajik
- Tamil
- Telugu
- Thai
- Ukrainian
- Urdu
- Uzbek
- Vietnamese
- Welsh
- Xhosa
- Yiddish
- Yoruba
- Zulu
How Does an ESP32 Development Board Display Accelerate ESP32 DEV Projects?
The ESP32 development board speeds up ESP32 DEV work by integrating the CPU, screen, touch input, and wireless radio on one tested board. You avoid the wiring, driver searching, and pin conflicts. Day 1, you begin writing your UI. This tutorial describes how that works, what qualities are important, and how to choose a board. It also reveals the memory math for a smooth user interface on a 2.4-inch monitor. My claims are based on our own product data, as well as public Espressif and LVGL literature, so you can verify them. Need gear to try your own ESP32 dev workflow? Guition is a maker of ESP32 development board displays. GUITION ESP32-2432S024R comes with factory test programs pre-loaded. Send your project scope and target quantity to David: david@guition.com. We will respond with sample alternatives, price, and a recommended course of development for your team’s toolchain.

How Does an ESP32 Development Board Display Simplify Hardware and Software Integration?
Many embedded teams spend their first weeks on integration, not on ideas. A basic ESP32 board, a standalone TFT display, a touch controller, and a speaker amplifier all have individual datasheets. Then you wire them up, power them up, and debug them together. An integrated board eliminates that labor before it even begins.
Fewer Parts to Wire and Debug
Imagine a distinct construction. You purchase an ESP32 DEV module, a 2.4-inch screen, a touch controller, a backlight driver, an audio amplifier, a light sensor, an RGB LED, and a TF card connector. That is eight sections with their own pins and voltage notes. A single loose jumper may cause the screen to flicker, and then you get to spend hours tracking it down.
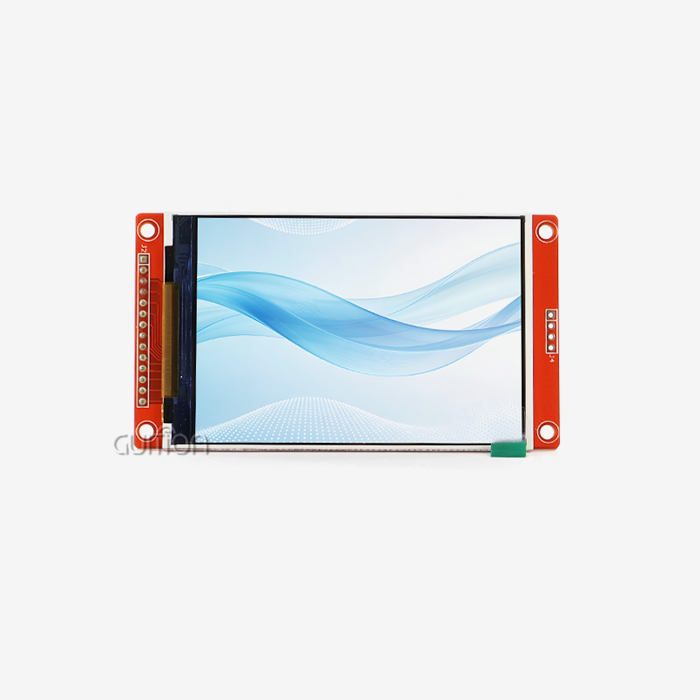
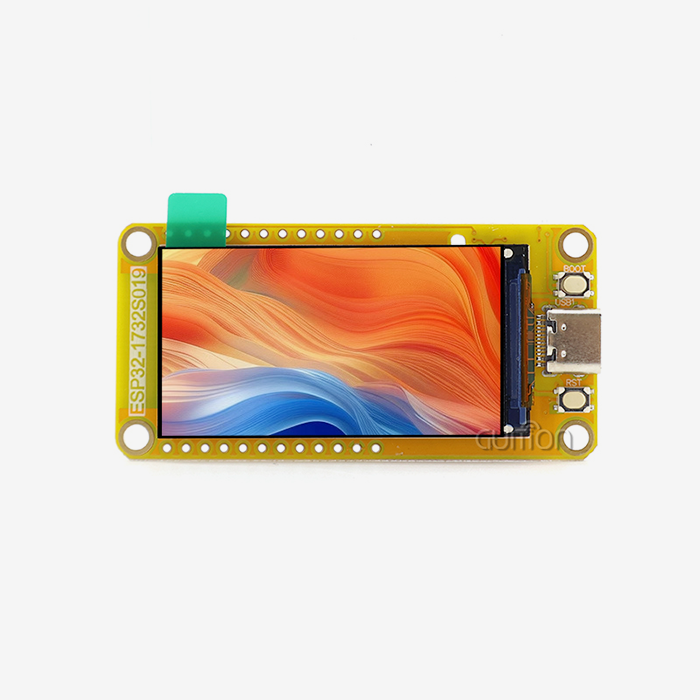
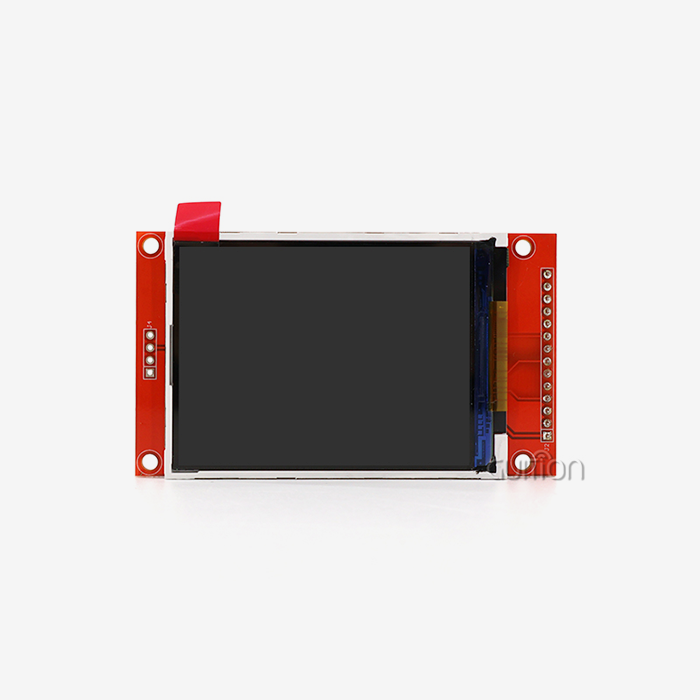
The GUITION ESP32-2432S024R puts all of those blocks on a single board. The module has a 2.4-inch LCD, backlight control circuit, touch screen control circuit, speaker drive circuit, photosensitive circuit, and RGB-LED control. On the edge, there is a TF card interface, a serial interface, a DHT11 temperature and humidity interface, and spare IO ports. You plug the USB in and go.
One Driver Stack Instead of Five
Integration of software is as important as wiring. Init sequences need to be right for display controllers. Touch controllers have their own bus configuration. PWM is needed for backlights. Each item works well on its own, but the combination frequently fails in weird ways, like a touch panel that stops reacting when the screen refreshes on a shared bus.
Espressif outlines this tiered technique in their LCD development guide. The guide breaks down the stack into SDK layer, driver layer, and application layer (Espressif esp-iot-solution manual, 2026). With a ready board, you had the first two layers lined up. You spend your effort at the application layer, where your product is really different from everyone else's.
Here's what it looks like in practice. The display, touch, and radio have been tested together by the manufacturer, so the integration risk is reduced with a ready ESP32 development board display. You may trust the pin map and go directly to what your consumer sees.
What Display Features Can Accelerate ESP32 DEV Application Development?
The speed of ESP32 DEV projects comes from features that take choices out. Every decision you don’t have to make saves a meeting, a test cycle, or a purchase order.” The right display board groups those selections into understandable defaults.
Preloaded Test Programs Shorten Day-One Setup
The ESP32-2432S024R comes factory programmed with test apps. Plug it in, and the screen, touch, and wifi functions come alive. This offers you a baseline you know is excellent. Whether your own code misbehaves later, you may flash back the sample and see whether the error is in hardware or software.
That baseline may also aid non-firmware personnel. A product manager may review the hardware feel by holding the board and tapping the screen before any developer has written a word of code. Such early input minimizes costly redesigns around launch.
Onboard Backlight, Audio, Light Sensor, and RGB LED
Little peripherals may make or break the feeling of completeness in a prototype. The perceived quality is enhanced with a dimmable backlight, speaker for warnings, light sensor for automated brightness, and RGB LED for status. But if you add them yourself, you will have additional boards and cables.
In this module, they are already linked. When the room becomes dark, you may darken the screen, sound an alert, and flash a color on a defect. Each of them requires a few lines of code instead of a hardware change.
Here are the characteristics that save the most development time on this type of board:
- Wiring and display pre-wiring. It’s paired with the resistive touch controller, so you don’t have to worry about the bus-sharing and chip-select blunders that plagued so many early implementations. If anything appears odd, you may try tap, drag, and hold motions within the hour and compare your results to the factory demo. That comparison alone saves most teams a whole day of guessing.
- Integrated music and lighting control. The PCB has a speaker driver and a light-sensitive circuit. You can add audible warnings and automatic brightness without additional modules, keeping your bill of materials modest and your enclosure design simple for early industrial design assessments and for the purchasers who read them.
- Ports for genuine sensors. DHT11 interface, serial port, TF card slot, and reserved IO; you may track temperature, store photos, and interact with other devices. Without adding another board to your stack, you can transform a demo into a real data logger and change sensors as needs evolve.
- With these qualities, a display board is no longer just a screen, but a compact, self-contained gadget. Your first prototype can detect, display, hear, and record data. That’s the behavior set most clients expect to see in a demo.
ESP32 Development Board Display Compatibility with Arduino IDE and ESP-IDF
Toolchain flexibility makes a team faster than any single hardware feature. Engineers work quicker in the setting they know best. Guition supports Arduino IDE, ESP-IDF, MicroPython, and Mixly on the ESP32-2432S024R.
Arduino IDE for Quick Sketches
Arduino IDE is great for fast proof-of-concept development. The Arduino-ESP32 core is maintained by Espressif. Its documentation covers peripherals with Arduino APIs spanning ESP32 development board display chip generations (Arduino-ESP32 documentation, Espressif, 2026). On the same site, it advises that not all chip families have all peripherals. Always check the chip variation before committing to a library.
Community code helps as well. Among the supported boards, there is the ESP32-2432S024 family of boards with resistive, capacitive, and no-touch versions (esp32-smartdisplay README, GitHub, 2026). It exposes one init call and utilizes PlatformIO. Libraries like these may reduce your setup to a few lines.
ESP-IDF for Production Control
ESP-IDF allows you complete control of memory, tasks, and power. Its esp_lcd component provides a single API (ESP-IDF LCD API reference, Espressif, 2026 for I2C, SPI, QSPI, I80, and RGB display interfaces. The API has a draw-bitmap method that pushes your buffer to the panel.
Espressif has an example spi_lcd_touch as well. It operates an LCD and a touch panel on the same SPI bus and shows a rudimentary LVGL interface. That sample is a close reference for your own firmware for a board with SPI display and resistive touch.
MicroPython and Mixly for Teaching and Scripting
Not all users are coding in C. Schools, makerspaces, and early-stage prototypers generally choose MicroPython or Mixly's block-based editor. ESP32-2432S024R supports both. A teacher may manage a classroom of touch-screen projects without teaching pupils SPI time.
This range is also relevant for employment. A board with four environments allows you to onboard a junior developer into a tool they currently use. And your senior engineer may subsequently switch the same project to ESP-IDF without changing hardware.
How Do Integrated Touchscreens Improve ESP32 DEV Project Efficiency?
Software replaces buttons, dials, and printed labels with touchscreens. That alteration accelerates development in two ways. You change a screen instead of cutting a new panel, and you push updates over the air instead of repairing hardware.
Resistive Touch in Real Environments
The ESP32-2432S024R has resistive touch. A resistive panel feels pressure, so it reacts to a stylus, fingernail, or gloved finger. Such behavior is appropriate for kitchens, workshops, and machine panels where the user wears gloves or has moist hands.
Resistive touch also reduces cost and eliminates the tweaking sometimes required with capacitive controllers near metal or water. The trade-off is less sharpness and a softer feel than a phone screen. Most teams accept this trade-off for control panels and equipment interfaces.
Calibration and Input Handling Tips
Resistive panels are calibrated once to translate raw measurements to screen coordinates. Run it once, save the settings in flash, and load them at startup. As part of our test programs, we provide a touch demo so you may verify the mapping before writing your own code.
Make your buttons for push input. Make touch targets big enough to be at least the size of a finger pad. Don't use small sliders on a 2.4-inch panel. A basic, bold layout is quicker for the user and requires fewer rounds of testing to get perfect.
Faster GUI Development with LVGL and ESP32 Display Modules
LVGL is the Light and Versatile Graphics Library – an open-source embedded GUI toolkit. It gives you buttons, sliders, charts, and animations, so you don't have to create them pixel by pixel. The recommended approach to link ESP32 input and output devices to its display system is Espressif’s component manager (LVGL documentation, 2026), according to the documentation of LVGL itself.
Why LVGL Fits a 2.4-Inch Panel: The Memory Math
This is the calculation I do before each ESP32 development board display dev board display project. The panel is 240 × 320 pixels, which means it has 76,800 pixels. At 16-bit color, each pixel requires 2 bytes. A complete frame buffer takes 153,600 bytes, or around 150 KB.
The ESP32 on this module contains 520 KB SRAM. A full buffer would use about 29% of it. A partial buffer of 30 rows requires 240 × 30 × 2 = 14,400 bytes, less than 3% of SRAM. LVGL draws in chunks, so a modest buffer is okay. That leaves room for the Wi-Fi, the Bluetooth, and your reasoning.
LVGL has a demo project for multiple ESP32 boards in its LV Port for ESP32 repository. Start there, plug in your display settings, and you have a functioning interface immediately.
Dual-Core Split for UI and Network
The ESP32 has two cores that operate at up to 240 MHz. Espressif datasheet has 539.98 CoreMark for one core at 240 MHz (Espressif ESP32 Series Datasheet v4.9). That’s plenty of space to separate tasks neatly.
Pin your LVGL job to a core and your network stack to the other. Wi-Fi reconnects, and Bluetooth scans run, and the screen remains smooth. No user ever sees a “frozen” interface because a cloud request took longer than planned.
Which Display Interfaces Should Developers Consider for ESP32 DEV Projects?
Pin count, speed, and cost are all interface-dependent. The esp_lcd driver supports I2C, SPI (including QSPI), I80, and RGB interfaces as mentioned in the Espressif LCD guide (Espressif esp-iot-solution manual, 2026). They are each good at a different thing.
SPI, I80, and RGB Compared
SPI is a good solution for tiny panels since it requires just a few pins. This is the correct choice for a 240 by 320 screen such as the one on the ESP32-2432S024R. I80 is an 8-bit parallel bus. Faster to transfer pixels, but more pins. RGB drives bigger displays and requires additional memory with specific timing signals.
LVGL’s literature notes that newer chips like the esp32 DEV series include built-in support for RGB and MIPI display interfaces. If your product demands a big high-res screen, budget for those processors. SPI is simple, affordable, and widely supported for a tiny control panel.
Expansion Ports: TF Card, Serial, DHT11, and Spare IO
The display speed is just half of the story. You’ll also need sensors and storage for your project. Fonts, pictures, and logs are stored in the TF card slot. The other controllers are linked via the serial port. DHT11 interface reads temperature and humidity. Custom demands are covered via reserved IO pins.
Consider these ports early. A project that records data to a TF card will have a different power budget than a project that merely renders a screen. By planning beforehand, you may avoid upgrading to a bigger board mid-project.
How Does an ESP32 Development Board Display Support Rapid Prototyping?
Rapid prototyping is about discovering inexpensive bad ideas. In days, you may demonstrate a functional screen to a client on a display board. You may try the plan out in the morning and modify it in the afternoon. The primary advantage of an ESP32 development board display is that feedback loop.
Application Scenario: Smart Home Control Panels
For a smart home panel, you need a screen, Wi-Fi, and a few sensors. The ESP32-2432S024R checks all three boxes. You can display room temperature using the DHT11 port, control lights over Wi-Fi, and dim the screen at night using the light sensor.
Home Assistant users are already using ESP32 touchscreens to create panels like this. There are larger Guition boards in the same family, and Community Home Assistant projects illustrate how developers employ this type of hardware in actual houses.
Application Scenario: Industrial Machine Interfaces
The factory operator must have a clear status screen on the equipment. A resistive panel will function with gloves on. The board may communicate with a PLC or motor controller using the serial connection. With the remote update, you may solve an interface problem without sending a specialist.
Here is a prototype that will evaluate the screen arrangement before you commit to a bespoke PCB. You may test with the actual operator in the real environment. Feedback is typically more of a design modification than any spec document.
Application Scenario: 3D Printers and Medical Devices
A 3D printer requires a live status monitor for temperature, progress, and mistakes. The medical or wellness gadget must include a patient-facing screen for readings and instructions. They both require a dependable touch input and a stable interface.
Guition’s product data cites these uses along with vehicle dashboards, EV charging interfaces, security access panels, consumer audio controllers, and retail kiosks. Each has the same requirement: a small human-machine interface that works the first day you turn it on.
The three use scenarios where quick prototyping on a single board is most beneficial are:
- Customer demonstrations before tooling. You can construct a functioning prototype of a control panel in days, and get it in front of a customer. They're pressing genuine buttons and seeing real data. Your design will be informed by their responses before you invest money in tooling, enclosures, or a bespoke circuit board. Their input tends to be more detailed than any poll you could compose.
- Internal design review. The same prototype may be used by engineers, designers, and management. A functional touch interface resolves layout arguments quicker than a slide deck because users can feel the interaction rather than picturing it from a graphic. Also, reviews are shorter since everyone is seeing the same functional screen.
- Field experiments with actual users. A Wi-Fi module powered by a battery may be used in a real kitchen, workshop, or lab. With you gathering logs via the network and fixing issues with remote updates, each trial cycle is faster than a hardware switch. You also have a single firmware base across all sites, which makes support easier.
- There is one benefit shared by these three designs. You learn earlier from the users, and you pay less for each class. That's the true acceleration driving a ready ESP32 development board display in an ESP32 development pipeline.
Key Hardware Specifications for Reliable ESP32 Display Development
The board carries your idea to production if the specifications say so. Compare with your requirements before you purchase. Here's the GUITION ESP32-2432S024R, in layman's terms.
Processor and Memory
The main controller is a twin-core ESP32 DEV MCU operating up to 240MHz. It features 448 KB ROM, 520 KB SRAM, and flash 4 Mb. The display is 2.4 inches with a 240x320 resolution and is resistive touch.
Those numbers align with a standard control interface. There’s a 4 MB flash for firmware, a few picture assets, and an over-the-air upgrade slot. If your product requires significant graphics or video, consider upgrading to a bigger panel with additional RAM.
Power and Wireless
During development, the board is powered up via USB. According to Guition’s product data, a lithium battery connects to an integrated charging circuit with protective features for portable usage. This makes a portable prototype feasible.
It has Wi-Fi and Bluetooth built in. You may transmit data to the cloud, link with a phone, or connect to a local network. Guition further says the module is constructed to industrial-grade manufacturing standards for lengthy, stable functioning. Test it out in your own setting to ensure it fits your needs.
From UI Design to Deployment: Streamlining ESP32 DEV Workflows
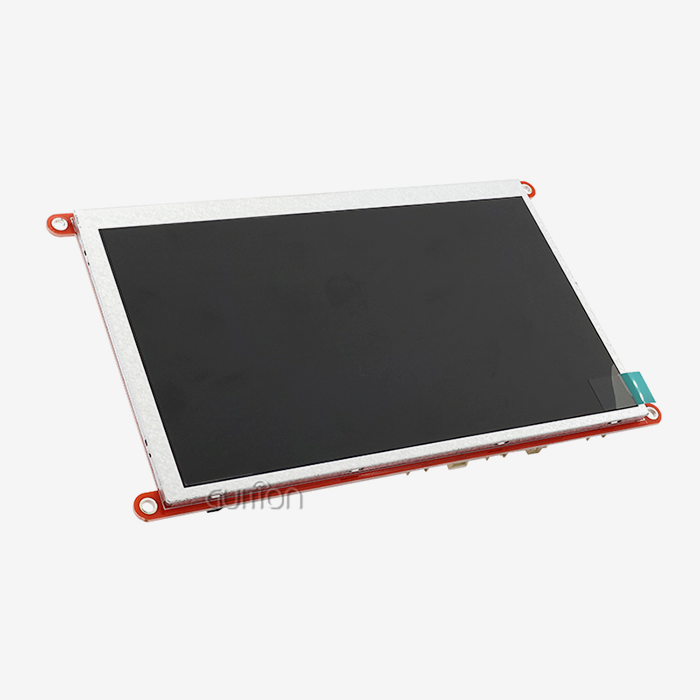
A good workflow takes a design from concept to deployed device with minimum handoffs. The journey is still short, since Guition is developing hardware and software tools. Our parent firm Jingcai Intelligence provides ESP32 development board display solutions from 1.28” to 21.5”.
Design with Drag-and-Drop Controls
Guition’s proprietary interface creation program provides you with a collection of controls. You add a control with one click and then move it to the correct spot and resize and customize it. The editor shows you what the final screen is going to look like as you work.
This way, designers may directly contribute. A designer may set out a screen without writing code, and an engineer can wire it to logic later. Online cross-platform debugging lets you find issues fast and reduces debugging time.
Remote Upgrades and Multi-Language Support
Upgrades are the highest expense once a gadget has been deployed. Guition's tools enable users to update projects remotely. You send out a patch across the network instead of to each site, which cuts down on after-sales expense.
The tools may also alter languages and encode text in Unicode. This is important if you are selling in many areas. The same firmware image may be used in a German kitchen, a Japanese lab, and a Brazilian workshop, with no separate builds.
Teams who follow this procedure have three tendencies. They prototype on actual hardware early on. They test for touch with actual users before finalizing a layout. They prepare their upgrade route before they deploy, not after a consumer detects an issue.
How to Choose the Right ESP32 Development Board Display for Embedded Applications?
Choosing a board is a matching exercise. Your project's size, input needs, and toolchain narrow the field quickly. Use the checklist below, then compare your shortlist.
A Practical Selection Checklist
Define the screen size and resolution first. The 2.4-inch, 240 by 320 ESP32 development board display is well suited to small controllers. Then choose a kind of touch. Resistive works with a stylus and gloves. Capacitive is more like a phone. Next, check memory — fancy visuals need more RAM than basic menus.
Consider your wifi demands, extension ports, and your favorite toolchain. Make that your tools (Arduino IDE, ESP-IDF, etc.) have functioning examples for the board. Finally, check with the provider for paperwork, availability of samples, and long-term supply.
Comparing Your Options
The table below compares three common routes for an ESP32 DEV display project.
| Approach | Setup effort | Included peripherals | Best fit |
|---|---|---|---|
| Discrete parts (ESP32 board + loose panel) | High: wiring, drivers, power | Only what you add | Custom hardware research |
| Integrated board such as GUITION ESP32-2432S024R | Low: plug in and run test programs | Touch, backlight, speaker driver, light sensor, RGB LED, TF card, DHT11 port | Prototypes, control panels, education |
| Larger or newer ESP32 display boards | Medium: depends on chip and interface | Varies by model | High-resolution or video products |
Discrete pieces allow you ultimate flexibility but cost the most time for every ESP32 DEV build. Integrated boards give up some independence for speed. Bigger boards provide more functionality but also more demands on memory and software complexity. For most teams constructing their first control panel, the integrated approach is the way to go. Once your idea is validated, you may always change to a bespoke board.
Conclusion
An ESP32 development board display slashes ESP32 DEV projects, eliminating integration labor. You get matching hardware, functioning demonstrations, plus a few toolchain choices on one board. Memory math suggests a tiny LVGL buffer allows plenty of capacity for wireless and logic. The similar trend may be seen in application examples from smart homes, industries, printers, and medical devices: quicker feedback and reduced prototype cost.
Pick a board that fits your demands for screen, touch, memory, and toolchain. Test it early in your actual setting. Arrange for remote updates before shipping. Follow those three practices and your prototype becomes a product with fewer surprises.
FAQ
1. What is an ESP32 development board display?
An ESP32 development board display is a module that combines an ESP32 microcontroller with an LCD screen, usually with touch input, on one board. It also adds wireless radios and extra interfaces. You can build a complete user interface without wiring separate parts.
2. Can I program the GUITION ESP32-2432S024R with Arduino IDE?
Yes. The module supports development in Arduino IDE, ESP-IDF, MicroPython, and Mixly. Beginners often start with Arduino IDE for quick tests. Teams that need tight control over memory and tasks move to ESP-IDF later.
3. Does a 2.4-inch ESP32 display have enough memory for LVGL?
Yes. A partial draw buffer of 30 rows at 240 pixels wide with 16-bit color needs 14,400 bytes. The ESP32 on this module has 520 KB of SRAM. That leaves plenty of memory for wireless features and application logic.
4. Is resistive or capacitive touch better for ESP32 projects?
It depends on the environment. Resistive touch works with gloves, styluses, and wet fingers, and it costs less. Capacitive touch feels smoother and supports gestures. Industrial and workshop panels often choose resistive, while consumer devices lean capacitive.
5. Can I update firmware remotely on an ESP32 display project?
Yes. Guition's tools support remote upgrades of user projects, so you can push fixes over the network. Plan your flash layout for an update slot early. The 4 MB flash on the ESP32-2432S024R can hold firmware plus update space for typical control interfaces.
6. Where can I buy ESP32 display modules in bulk?
Contact Guition at david@guition.com. We supply ESP32 development board display modules, including the ESP32-2432S024R, and can discuss samples, pricing, and volume orders based on your project.
Cut Your Next Prototype Cycle with Guition ESP32 Display Modules
Ready to test an ESP32 development board display on your own bench? Guition works as a direct ESP32 development board display supplier for engineers, integrators, and product teams. Email David at david@guition.com with your target screen size, toolchain, and quantity. We will recommend a model, share documentation, and arrange samples so your ESP32 DEV team can start building this week.
References
1. Espressif Systems, ESP32 Series Datasheet (online release, accessed 2026). Used for the 240 MHz CoreMark figure. https://www.espressif.com/sites/default/files/documentation/esp32_datasheet_en.pdf
2. LVGL, Espressif (ESP32) Integration Overview (documentation, accessed 2026). Used for LVGL porting guidance and the LV Port for ESP32. https://docs.lvgl.io/latest/en/html/integration/chip_vendors/espressif/overview.html
3. Espressif Systems, ESP-IDF Programming Guide: LCD (documentation, accessed 2026). Used for supported interfaces and the draw-bitmap flush. https://docs.espressif.com/projects/esp-idf/en/stable/api-reference/peripherals/lcd/index.html
4. Espressif Systems, Arduino-ESP32 Libraries (documentation, accessed 2026). Used for peripheral support notes. https://docs.espressif.com/projects/arduino-esp32/en/latest/libraries.html
5. rzeldent, esp32-smartdisplay README (GitHub, accessed 2026). Used for supported board families and setup steps. https://github.com/rzeldent/esp32-smartdisplay/blob/main/README.md
6. Espressif Systems, LCD Development Guide (esp-iot-solution documentation, accessed 2026). Used for the layered framework and interface list. https://docs.espressif.com/projects/esp-iot-solution/en/latest/display/lcd/lcd_development_guide.html
7. Product data for the GUITION ESP32-2432S024R and the company overview come from Guition's own materials: https://jingcaizhineng.aixdb.cn/
About the author
David is the CEO of Guition, the brand of Jingcai Intelligence, a technology company that integrates research and development, production, and sales of human-machine interface display solutions. His team builds esp32 display modules and USART-HMI displays from 1.28 to 21.5 inches, plus the Guition interface design software. He works directly with engineers and buyers on prototyping, firmware options, and volume supply.
Learn about our latest products and discounts through SMS or email