- English
- French
- German
- Portuguese
- Spanish
- Russian
- Japanese
- Korean
- Arabic
- Greek
- German
- Turkish
- Italian
- Danish
- Romanian
- Indonesian
- Czech
- Afrikaans
- Swedish
- Polish
- Basque
- Catalan
- Esperanto
- Hindi
- Lao
- Albanian
- Amharic
- Armenian
- Azerbaijani
- Belarusian
- Bengali
- Bosnian
- Bulgarian
- Cebuano
- Chichewa
- Corsican
- Croatian
- Dutch
- Estonian
- Filipino
- Finnish
- Frisian
- Galician
- Georgian
- Gujarati
- Haitian
- Hausa
- Hawaiian
- Hebrew
- Hmong
- Hungarian
- Icelandic
- Igbo
- Javanese
- Kannada
- Kazakh
- Khmer
- Kurdish
- Kyrgyz
- Latin
- Latvian
- Lithuanian
- Luxembou..
- Macedonian
- Malagasy
- Malay
- Malayalam
- Maltese
- Maori
- Marathi
- Mongolian
- Burmese
- Nepali
- Norwegian
- Pashto
- Persian
- Punjabi
- Serbian
- Sesotho
- Sinhala
- Slovak
- Slovenian
- Somali
- Samoan
- Scots Gaelic
- Shona
- Sindhi
- Sundanese
- Swahili
- Tajik
- Tamil
- Telugu
- Thai
- Ukrainian
- Urdu
- Uzbek
- Vietnamese
- Welsh
- Xhosa
- Yiddish
- Yoruba
- Zulu
Arduino LCD ESP32: How to Wire SDA and SCL Correctly?
When connecting an Arduino LCD ESP32 display via I2C communication, proper wiring of the SDA (data line) and SCL (clock line) pins is essential for reliable operation. The ESP32 operates at 3.3V logic levels, and its flexible I2C architecture allows assignment of SDA and SCL to various GPIO pins—commonly GPIO21 for SDA and GPIO22 for SCL on standard ESP32 boards. Incorrect connections or voltage mismatches can cause communication failures, white screens, or permanent damage to your microcontroller. This guide provides a clear, step-by-step approach to correctly wire these critical pins, configure your development environment, and troubleshoot common issues, ensuring your display integration performs flawlessly in industrial control systems, smart home devices, and IoT applications.

Understanding the Basics of I2C Communication Between ESP32 and LCD Displays
The I2C (Inter-Integrated Circuit) protocol has become the backbone of modern embedded display systems, particularly when integrating Arduino LCD ESP32 modules into complex projects. This two-wire serial communication standard simplifies connections by using just two lines—SDA for bidirectional data transfer and SCL for clock synchronization—alongside power and ground connections.
How the I2C Protocol Works in ESP32 Display Systems
The I2C bus uses unique addressing to share communication channels between devices. The master controller ESP32 initiates all communication sequences with slave devices like LCD modules. Each I2C device has a 7-bit or 10-bit address, allowing the master to choose to connect with shared bus peripherals. This architecture is ideal for industrial control panels and medical monitoring devices with various sensors and displays on the same network.
In fast mode, the ESP32's I2C implementation can achieve 400kHz and 1MHz. This bandwidth works for most text-based LCDs and smaller graphics displays. When the master pulls the SCL line low and high, clock pulses are created, and data bits move along the SDA line synced to them. Typically, 4.7kΩ pull-up resistors keep lines at logic high when idle, enabling devices to use the bus without problems.
ESP32 I2C Pin Architecture and Flexibility
Due to its GPIO matrix, the ESP32 has more pin freedom than standard Arduino boards. Software can assign SDA or SCL to almost any GPIO pin. This adaptability proves crucial when designing custom PCBs for smart appliances or agricultural automation systems where physical layout constraints dictate pin selection.
Similar to Arduino, ESP32 development boards default to GPIO21 as SDA and GPIO22 as SCL. These pins may conflict with SPI displays or UART interfaces; thus, you can reassign I2C functionality to GPIO32/GPIO33 or GPIO25/GPIO26. This flexibility avoids complex hardware workarounds in fixed-pin systems.
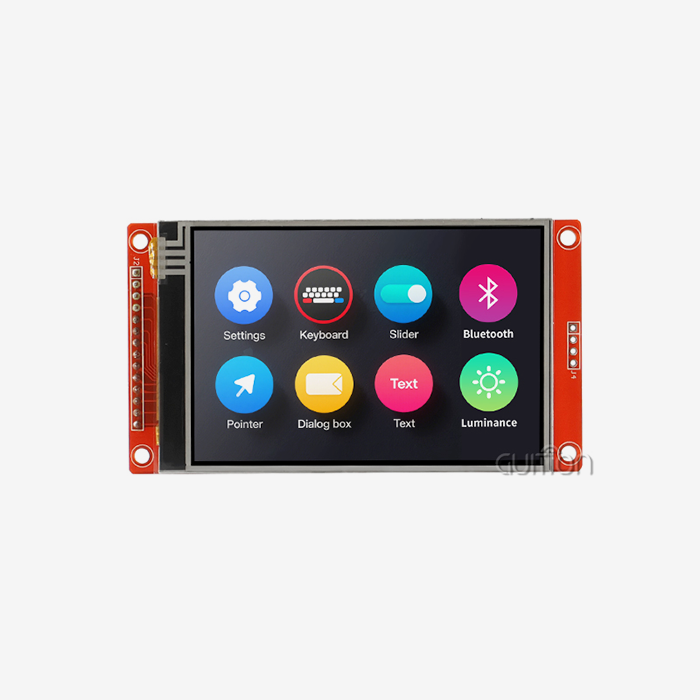
Advanced modules like the Guition ESP32-1732S019N-I employ the ESP32-S3 model, which has dual-core processing at 240 MHz and better I2C. This power allows simultaneous Wi-Fi connectivity and smooth display refreshes, helping product managers design next-generation HMI solutions to meet time-to-market requirements. 512KB SRAM and 16MB Flash storage provide complex UI frameworks without performance reduction.
Voltage Level Considerations for Safe I2C Connections
A critical technical distinction separates the ESP32 from legacy Arduino boards: logic level voltage. The ESP32 strictly operates at 3.3V, whereas many Arduino LCD modules designed for ATmega-based boards expect 5V signals. Connecting a 5V LCD directly to ESP32 GPIO pins creates overvoltage conditions that can permanently damage the microcontroller's input circuitry.
When interfacing with 5V I2C devices, you must implement bidirectional logic level converters using MOSFETs or dedicated shifter ICs like the TXS0108E. These components translate 3.3V signals from the ESP32 to 5V levels expected by the LCD, and vice versa, protecting both devices while maintaining signal integrity. Alternatively, choosing 3.3V-compatible LCD modules simplifies integration for commercial terminals and energy management systems, where reliability is paramount.

Step-by-Step Guide to Wiring SDA and SCL Correctly for Arduino LCD on ESP32
Proper physical connections form the foundation of reliable I2C communication between your microcontroller and display. This section provides detailed hardware setup instructions that prevent common mistakes encountered during prototype development and production assembly.
Required Components and Tools
Before beginning the wiring process, gather these essential components. You need an Arduino LCD ESP32 development board—preferably the ESP32-S3-based modules that offer superior processing power and memory. The LCD module should feature I2C interface capability, typically via an onboard PCF8574 I2C backpack for character displays or native I2C support for OLED screens.
Additional materials include male-to-female jumper wires rated for your application's environmental conditions, a breadboard for prototyping, a stable 5V or 3.3V power supply depending on your display requirements, and optionally, 4.7kΩ pull-up resistors if your LCD module lacks built-in resistors. For permanent installations in industrial equipment or smart device enclosures, soldering equipment and heat-shrink tubing ensure robust connections that withstand vibration and thermal cycling.
Identifying Correct Pin Connections on ESP32 and LCD Modules
Your hardware must be examined to find the right pins. GPIO21 and GPIO22 are designated on the silkscreen and installed along the edge of standard ESP32 DevKit boards. Consult your board's wiring diagram before starting because several manufacturers use different labels.
GND, VCC, SDA, and SCL are usually visible on I2C backpack character LCD modules. OLED screens have similar conventions but may have reset pins. Check your module's voltage requirements—"5V" means logic level conversion, whereas "3.3V" or "3.3V-5V" means direct compatibility with ESP32 logic levels.
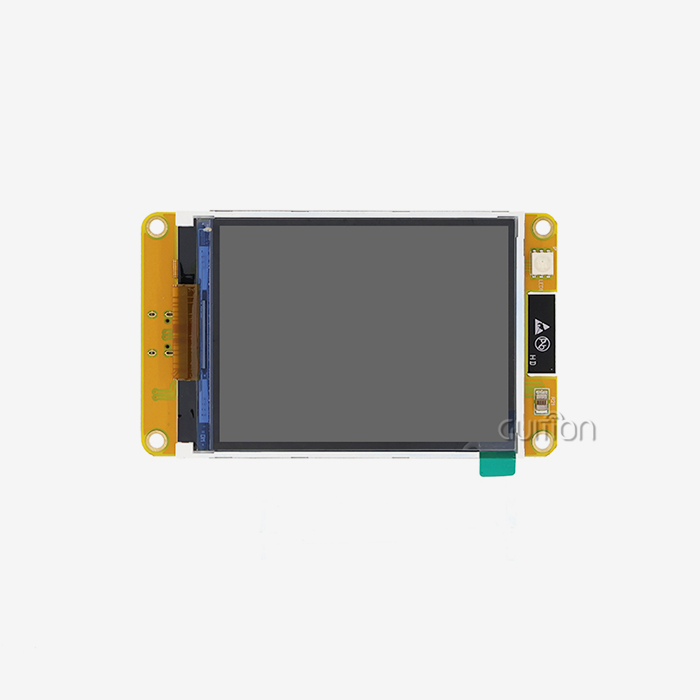
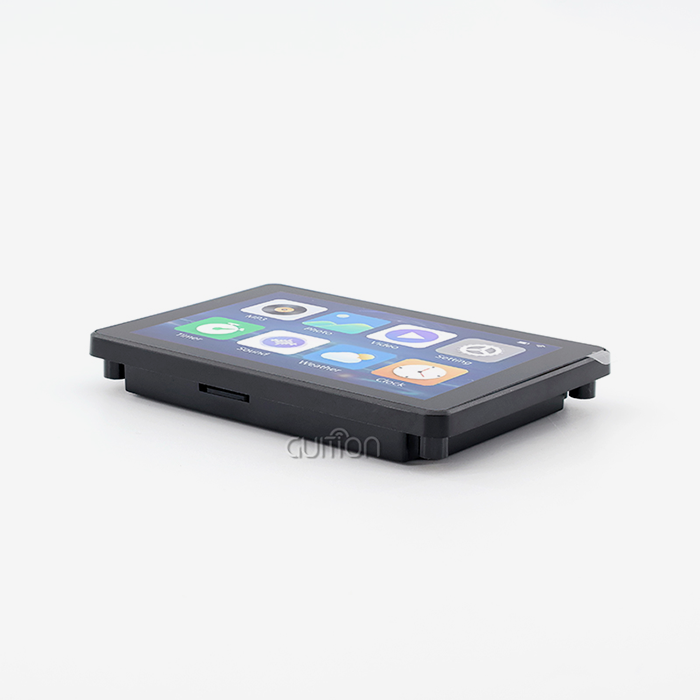
The Guiton ESP32-1732S019N-I display module simplifies identification with clearly indicated interfaces and extensive documentation. The built-in ESP32-S3-WROOM-1 controller controls the display and I2C devices, which reduces the number of parts needed and potential points of failure.
Wiring Instructions with Best Practices
Connect the LCD's GND pin to any ESP32 GND pin using a reliable jumper wire. Ground connections establish the common reference voltage essential for accurate signal interpretation. Next, connect the LCD's VCC pin to the appropriate power supply—3.3V or 5V, depending on your display's specifications and whether you're using level shifters.
Attach the LCD's SDA pin to GPIO21 on the ESP32, and the SCL pin to GPIO22. If using logic level converters, the connections run from ESP32 GPIOs to the converter's low-voltage side (LV), then from the converter's high-voltage side (HV) to the LCD module. Ensure the converter's reference voltages match your system—3.3V to LV_REF and 5V to HV_REF.
Wire routing matters significantly in electrically noisy environments common to automation control systems. Keep I2C wires short and away from high-current motor drivers or switching power supplies. Twisted-pair or shielded cables reduce electromagnetic interference that can corrupt data transmission. In production equipment, strain relief prevents mechanical stress from breaking solder joints or loosening connector contacts during equipment operation or maintenance activities.

Software Configuration in Arduino IDE
After completing hardware connections, configure the software environment to communicate with your display. Launch Arduino IDE and install the ESP32 board support package through the Boards Manager. This package provides the necessary compiler toolchain and hardware abstraction layers for ESP32 development.
Install the Wire library (included in Arduino core) and your display-specific library—LiquidCrystal_I2C for character LCDs or Adafruit_SSD1306 for OLED screens. These libraries abstract low-level I2C transactions into simple, readable commands. In your sketch, initialize the I2C bus by calling Wire.begin(SDA_PIN, SCL_PIN) if using non-default pins, or simply Wire.begin() to use GPIO21 and GPIO22.
Troubleshooting Common Arduino LCD ESP32 Wiring Problems
Even with careful attention to wiring procedures, integration challenges arise during development and deployment. Understanding diagnostic techniques accelerates problem resolution, minimizing project delays.
Diagnosing Display Failures and Communication Errors
When the display remains blank or shows corrupted characters, systematic troubleshooting identifies the root cause. Begin by verifying physical connections—loose jumper wires account for a significant percentage of failures in prototype systems. Measure voltage levels at the LCD's VCC and GND pins to confirm proper power delivery. Voltage drops below specifications indicate inadequate power supply capacity or excessive wire resistance.
Run an I2C scanner utility to detect connected devices. This simple diagnostic tool sweeps through all possible I2C addresses and reports which devices respond. If the scanner finds no devices, the issue likely stems from wiring errors, missing pull-up resistors, or defective hardware. Multiple devices appearing at the same address indicate addressing conflicts requiring configuration changes.
Communication errors manifest as garbled text or intermittent operation. These symptoms often trace to electrical noise, inadequate pull-up resistors, or capacitive loading from excessively long wires. Reducing wire length, adding ferrite beads, or implementing proper shielding resolves most noise-related issues in industrial environments where motor drives and relay coils generate electromagnetic interference.
Addressing Voltage Level Mismatches and Logic Conflicts
The worst wiring mistake when using Arduino LCDESP322 is to connect 5V I2C devices directly to 3.3V ESP32 pins. Some engineers report "success" with direct connections; however, the LCD module's input protection diodes clamp voltage spikes, making this method unpredictable and risky over time. Commercial electronics and medical apparatus require long-term reliability; hence, professional designs always use level shifting.
Make sure logic-level converters are bidirectional. Easy voltage divider circuits work for unidirectional signals, but not I2C's bidirectional SDA line. MOSFET-based shifters like the BSS138 or integrated solutions translate both ways reliably. Incorrect converter orientation or reference voltage connections hinder communication; thus, check pinout documentation during assembly.
Direct ESP32 compatibility is available in LCD modules with 5V input voltage regulators and 3.3V internal electronics. Before presuming compatibility based on physical connector arrangement, check your module's specs.
Resolving Software Configuration and Library Conflicts
Software difficulties can mimic hardware breakdowns. The wrong I2C address in the code precludes communication even with flawless wiring. Character LCD modules usually utilize 0x27 or 0x3F; however, I2C backpack manufacturers vary. Please check the device manuals or scanner utilities for the correct address.
Libraries' version discrepancies cause subtle issues hard to spot. Multiple display libraries can cause the Arduino IDE's library management to install conflicting versions. Uninstall unnecessary libraries and use ESP32-tested versions. The Guition development ecosystem solves these compatibility issues with curated libraries and pre-validated code examples that function across 1.28-inch to 21.5-inch monitors.
Some LCD modules that require extra transaction processing time have clock stretching difficulties. The ESP32's I2C implementation enables clock stretching; however, slower devices may need different timeouts. Increasing Wire library timeout parameters fixes display update hangs, especially when driving sophisticated graphical material in smart home control panels or energy monitoring dashboards.
Comparing Display Technologies and Selecting Optimal Solutions for ESP32 Projects
Choosing the right display technology impacts development efficiency, power consumption, and end-user experience. Understanding the tradeoffs between available options helps procurement managers and system architects make informed decisions aligned with project requirements.
Character LCD vs OLED vs TFT Display Technologies
Character LCDs are ideal for low-power text display. These liquid crystal displays with LED backlights utilize 20-50mA. In industrial control panels that need uniform information, their fixed character matrix (16x2 or 20x4) works. Cost-sensitive consumer electronics benefit from mature technology's competitive pricing and supplier availability.
Self-emissive pixel technology gives OLED displays better contrast and viewing angles. Each pixel produces its own light, eliminating glare and enabling true blacks. Dark interfaces save electricity, which is useful for battery-powered medical devices and handheld instrumentation. OLED screens cost more than LCDs and lose brightness over 10,000–50,000 hours.
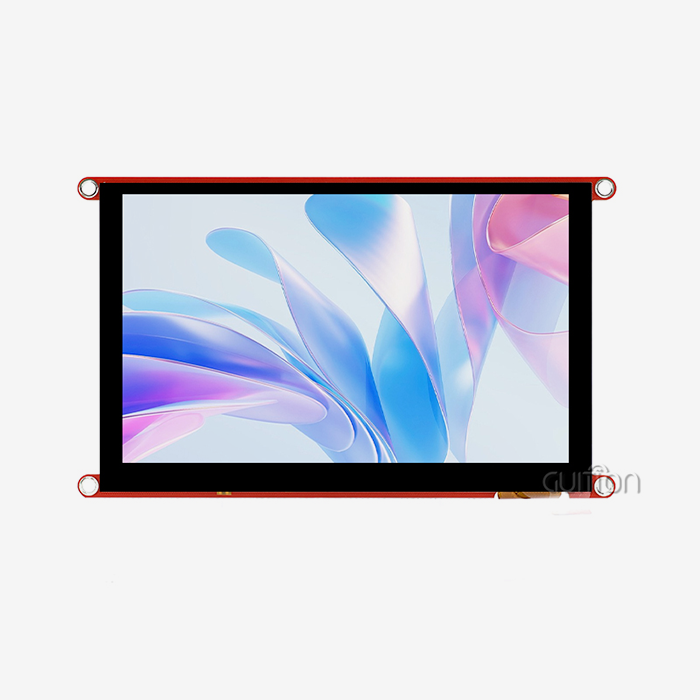
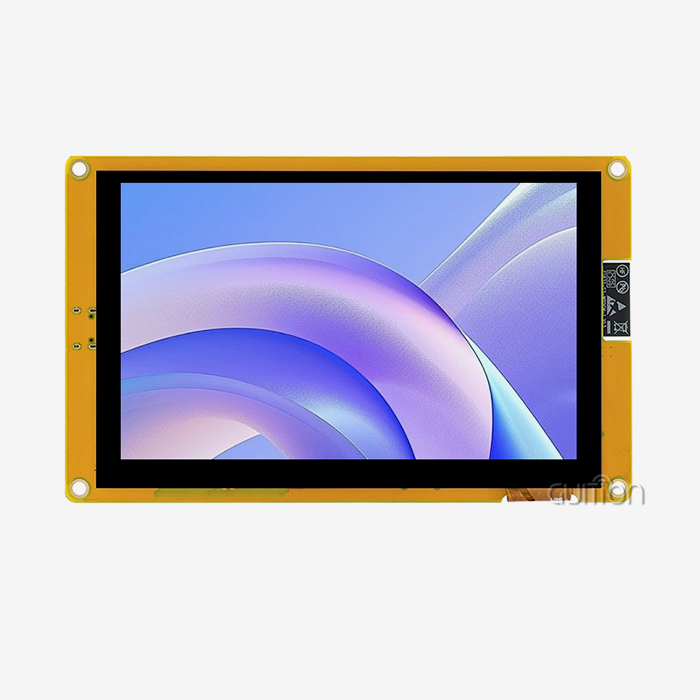
With resolutions from 128x160 to 480x320 pixels and beyond, TFT displays can display full-color graphics. The Guition ESP32-1732S019N-I module's 1.9-inch IPS TFT panel with 170x320 resolution displays rich 16-bit color across wide viewing angles. TFT technology is ideal for smart appliances, business terminals, and agricultural automation systems that use visual data presentation to improve operator efficiency. The higher information density and user interaction explain the 100-300mA power consumption of these screens.
I2C vs SPI Communication Interface Considerations
I²C requires only two signal lines, power, and ground, simplifying wiring. In space-constrained enclosures and high-volume manufacturing, minimalism decreases connector complexity and assembly costs. I2C's shared bus architecture limits data throughput to 400kbps in common implementations, limiting graphical content refresh rates. I2C works well for character LCDs and small monochrome OLEDs, but color TFT displays need quicker interfaces.
Integrating Arduino LCD ESP32 into SPI (Serial Peripheral Interface) enables ESP32 clock speeds beyond 40 MHz with dedicated data lines for each device. This increased bandwidth allows TFT displays to run animations and video smoothly, which is essential for modern HMI applications. Although SPI requires four to six GPIO pins—adding some wiring complexity—it significantly improves performance, making it ideal for responsive user interfaces in medical monitoring devices and IoT dashboards.
The Guiton display module uses the ESP32-S3's dual-core design to handle Wi-Fi and Bluetooth connectivity and high-speed SPI display transmission. By eliminating frame rate stuttering in single-core systems, parallel processing ensures smooth operation even during high network activity.
Evaluating Display Module Suppliers for B2B Procurement
Beyond component pricing, supplier selection greatly affects project success. Adafruit and Seeed Studio provide technical documentation, community assistance, and high-quality products for prototyping and early development. Their educational focus helps entrepreneurs and small engineering teams integrate their first integrated display.
Guition focuses on industrial-grade reliability and complete development assistance for professional applications. Guition's product ecosystem supports 1.28-inch to 21.5-inch displays, ensuring supplier consistency across product lines. Drag-and-drop controls, WYSIWYG preview, and one-click deployment in their Guition UI development tools speed up interface design and decrease time-to-market pressures for product managers in competitive industries.
Assess regulatory certifications (RoHS, CE, and FCC compliance), supply chain stability during component shortages, technical support responsiveness, and readiness to deliver customized solutions when selecting Arduino ESP32 LCD volume producers. Long-term cooperation with technically proficient suppliers decreases obsolescence risks and assures product quality across several production cycles in industrial equipment and smart device mass production.
Best Practices for Procuring Arduino LCD Modules for ESP32 in Professional Applications
Strategic procurement decisions impact both immediate project success and long-term product sustainability. Understanding technical specifications and supply chain considerations prevents costly redesigns and production delays.
Technical Specification Analysis for Display Modules
Information density and physical limits determine display size. Industrial control panels use 7-inch to 10-inch screens for comfortable operator viewing, whereas smart home devices use 1.9-inch to 3.5-inch displays in wall-mounted enclosures. The Guition ESP32-1732S019N-I's 1.9-inch size factor is ideal for thermostat controls, doorbell cameras, and portable diagnostic devices that require visual feedback.
Resolution controls text and image clarity. Character LCDs have fixed resolutions based on their character matrix, but TFT displays are pixel-addressable. Guition's 170x320 pixel resolution fits 21 lines of short text or complicated graphical widgets illustrating sensor data trends. Higher resolutions may require the use of ESP32-S3 or other powerful microcontrollers due to their processing power and memory.
Interface compatibility testing reduces development integration surprises. I2C, SPI, and parallel display module communication protocols should match your microcontroller's capabilities and GPIO pins. Test logic level—3.3V native interfaces simplify integration; 5V displays require level shifting. Touch capability complicates the development schedules for consumer electronics by adding communication channels and calibration procedures.

Regulatory Compliance and Certification Requirements
Commercial products must meet regional safety and electromagnetic compatibility criteria. For European market access, displays must be RoHS-compliant and free of lead, mercury, and other substances. CE marking demonstrates compliance with EU health, safety, and environmental protection regulations, while FCC certification ensures that electromagnetic emissions are legal for distribution in the US.
Display modules for medical device development may require IEC 60601 certifications based on device classification and patient contact. These strict standards affect supplier selection because not all manufacturers possess medical-grade quality management systems and documentation. Guition's industrial-grade reliability makes its products suitable for demanding applications where failure repercussions go beyond discomfort.
Component shortages have made supply chain issues more crucial. Assess supplier inventory depth, lead time consistency, and long-term availability guarantees. Standards for display modules with five-year or longer production lifecycles prevent forced redesigns due to component obsolescence, which is especially important for industrial equipment with 10-15-year service lives.
Bulk Purchasing Strategies and Supplier Partnerships
Volume pricing greatly affects manufacturing economics. Most distributors provide 100, 500, 1,000, and 10,000 unit quantity breaks. Receiving quotations across these volumes discloses price structures and optimizes purchase amounts versus inventory expenses. Guition and other specialized suppliers negotiate custom pricing for OEM relationships comprising technical co-development or exclusive product variants for specific application requirements.
Custom packaging for kits simplifies ordering and assembly. Pre-packaged display modules, cables, mounting hardware, and example firmware reduce production line receiving inspection time and assembly faults. These kits help scale prototype volumes to initial production runs by maintaining consistent configurations and simplifying quality control.
Strategic partnerships with technically qualified suppliers provide benefits beyond pricing. Access to pre-release product knowledge allows for next-generation designs. Technical support escalation routes expedite the resolution of production issues. Shortage supply distribution favors established partners with stable order histories. These relationship-based benefits help product lines survive industry changes and competitive challenges in fast-changing sectors like IoT solutions and automation systems.
Conclusion
Wiring an Arduino LCD ESP32 display needs attention to hardware connections, voltage compatibility, software settings, and component selection. Identifying and connecting the SDA and SCL pins is essential, and making sure the voltage levels are right protects important ESP32 GPIOs. Systematic problem-solving speeds development, and a knowledgeable display of technology selection enhances performance for individual applications. Professional procurement ensures product sustainability through strong supplier partnerships and technical criteria. Engineers and product managers can build dependable HMI systems that meet deadlines for industrial equipment, smart devices, and commercial uses by using these combined factors.
FAQ
What are the default I2C pins for Arduino LCD ESP32 connections?
The standard ESP32 development boards typically use GPIO21 as the SDA pin and GPIO22 as the SCL pin for I2C communication. However, the ESP32's flexible GPIO matrix allows you to reassign these functions to nearly any available GPIO pins through software configuration. This flexibility proves valuable when default pins conflict with other peripherals in your design. When using non-standard pin assignments, explicitly declare them in your code using Wire.begin(SDA_PIN, SCL_PIN) to ensure proper initialization.
Can I connect a 5V Arduino LCD directly to an ESP32?
Direct connection of 5V LCD modules to ESP32 GPIO pins risks permanent damage to the microcontroller, as the ESP32 operates strictly at 3.3V logic levels. Always implement bidirectional logic level converters using MOSFETs or dedicated shifter ICs when interfacing with 5V I2C devices. Alternatively, select LCD modules specifically designed for 3.3V operation to eliminate this complexity and improve system reliability in professional applications.
Why does my display show garbled text or a white screen?
Garbled display output typically indicates incorrect I2C address specification in your code, loose wiring connections, or insufficient power supply. Run an I2C scanner utility to verify device detection and correct addressing. Check all physical connections for continuity and measure voltage at the display's VCC pin to confirm adequate power delivery. White screens often result from backlight issues, incorrect initialization sequences, or communication failures due to missing pull-up resistors on the I2C bus.
How do I improve I2C communication reliability in noisy industrial environments?
Reducing electromagnetic interference requires multiple strategies. Keep I²C wire runs short—preferably under 6 inches for prototypes and using twisted-pair or shielded cable for production installations. Route I2C traces away from high-current switching circuits and motor drivers. Add ferrite beads on SDA and SCL lines near the ESP32 to suppress high-frequency noise. Ensure solid common ground connections between all system components, and consider isolated power supplies for particularly noisy subsystems to prevent ground loop contamination.

Are you ready to Accelerate Your Arduino LCD ESP32 Display Development?
Guition specializes in delivering production-ready Arduino LCD ESP32 display solutions that eliminate integration headaches. Our ESP32-1732S019N-I module combines the powerful ESP32-S3-WROOM-1 dual-core processor with a vibrant 1.9-inch IPS display, providing the performance and reliability your application demands. With integrated Wi-Fi and Bluetooth, 16MB Flash storage, and support for Arduino IDE, ESP-IDF, and MicroPython development environments, you gain flexibility without complexity. Our proprietary Guition UI development software enables rapid interface creation through intuitive drag-and-drop design, eliminating weeks of low-level coding. Whether you're an Arduino, LCD, or ESP32 manufacturer seeking reliable components or a system integrator building next-generation HMI solutions, our technical team provides comprehensive support from prototype to production. Contact david@guition.com to discuss your project requirements and discover how Guition's display modules reduce development time while enhancing product capabilities.
References
1. Espressif Systems. "ESP32-S3 Technical Reference Manual." Espressif Systems Documentation, 2023.
2. Phillips Semiconductors. "I2C-bus Specification and User Manual." NXP Semiconductors Technical Publication, 2021.
3. Adafruit Industries. "All About I2C: Protocol Basics and Pull-up Resistors." Adafruit Learning System, 2022.
4. Barrett, Steven F. "Arduino Microcontroller Processing for Everyone: Third Edition." Morgan & Claypool Publishers, 2020.
5. Monk, Simon. "Programming the ESP32: Learn How to Program Arduino Sketches on the ESP32." McGraw-Hill Education, 2022.
6. International Electrotechnical Commission. "IEC 60063: Preferred Number Series for Resistors and Capacitors." IEC Standards Publication, 2019.
Learn about our latest products and discounts through SMS or email